Showing posts with label Postage Due. Show all posts

Wednesday, August 21, 2013

CREATIVE STAMPIN' UP CONVENTION SWAPS

I have a million things to get done today, so don't ask me why I am on my computer updating my blog.  Probably because it has been over a week since I have posted and you all are starting to think I haven't been getting my fingers inky!!  But I have been a busy beaver the last couple of days getting my swap cards done for Ronda Wade's Creative Convention this weekend.  It is such an awesome event, with demonstrators attending from many states and Canada.  It is packed with information, demonstrations, and fun things to do; like a smaller version of a Stampin' Up Convention.

I really will try to post a few pictures while I am there (but I always say that and end up posting when I get back).  So instead I will share an advanced look at my swap cards.  The night before the opening session we have a huge Shoebox Swap -- which I love attending -- and then there will be general swapping during the convention.  So these are my swaps:


This will be my Shoebox Swap card.  Product used include:  Post Card, Christmas Messages, Postage Due, Tag It, and Snowflake Soriee Stamp Sets; Cherry Cobbler and Crumb Cake Cardstock; Early Espresso Classic Ink; Chalk Talk Framelit; Postage Stamp Punch; Cherry Cobbler Baker's Twine; and Sponge.
 
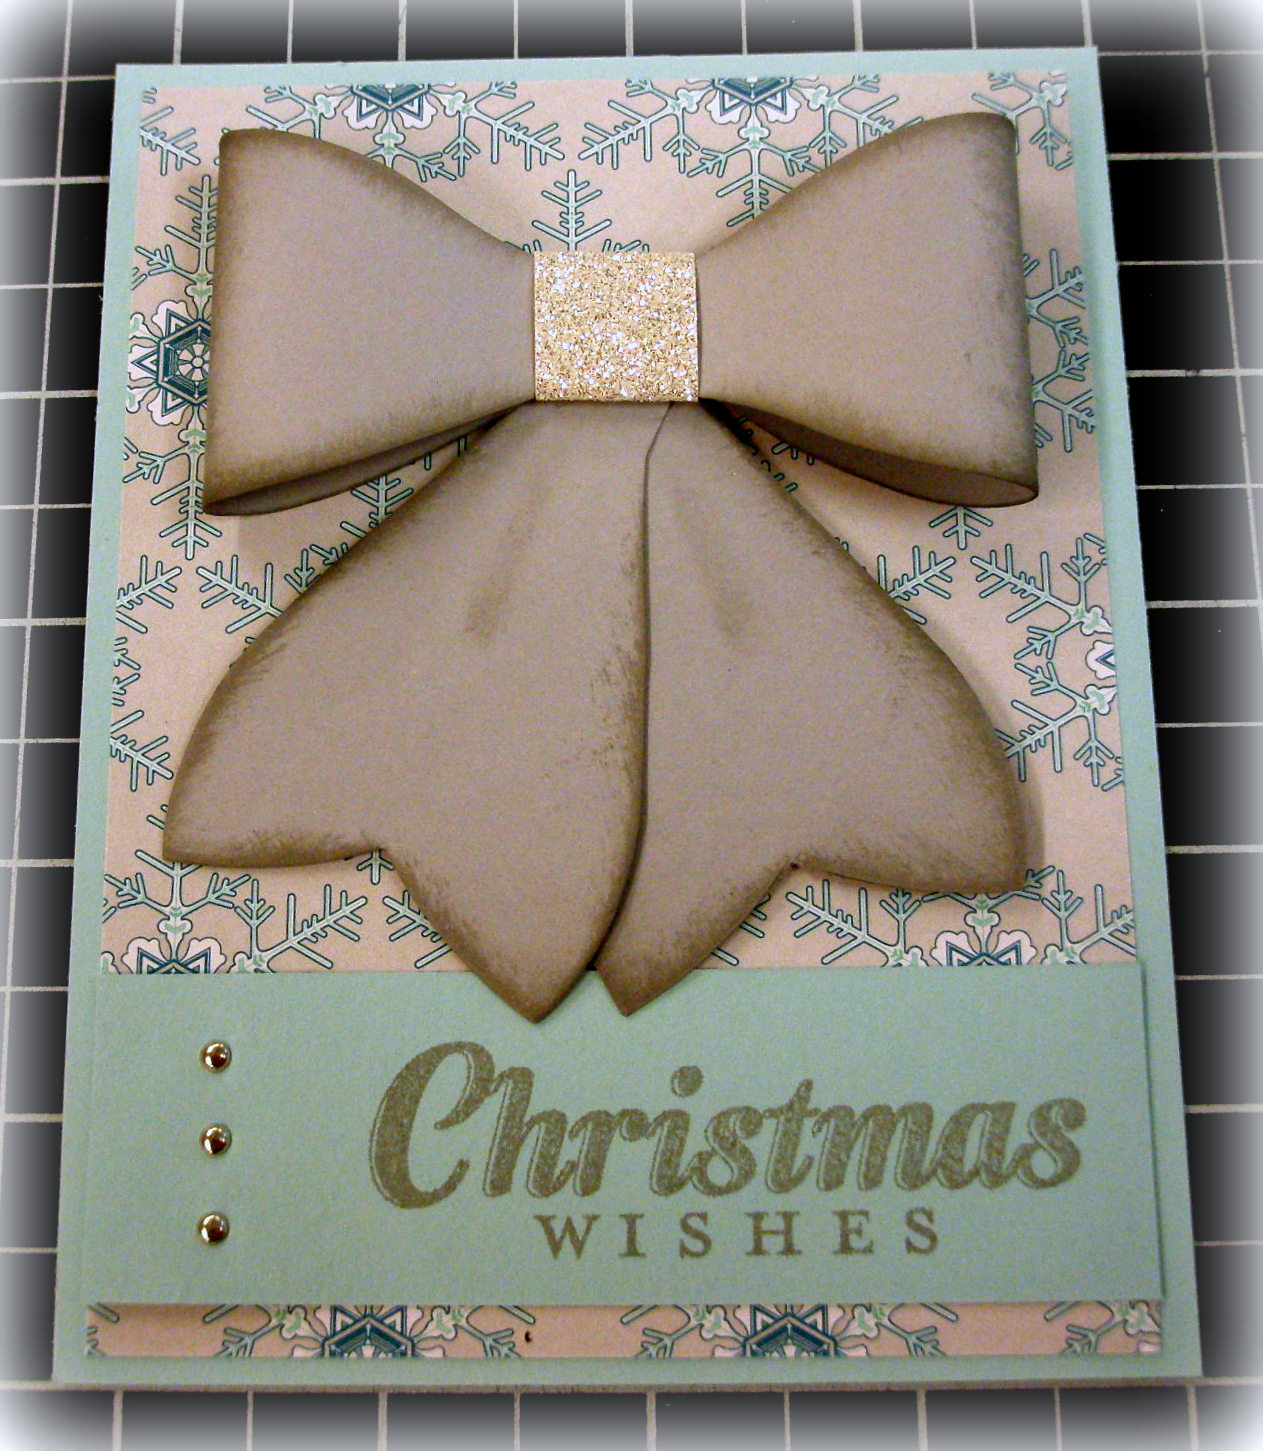
This is for my Christmas Swap.  I couldn't make up my mind which design I liked the most so I did three different designs (see other 2 below).  Stampin' Up product used:  Joy to the World Stamp Set; Craft Bow Bigz L Die; Winter Frost Designer Series Paper; Pool Party and Smoky Slate Card Stock; Silver Glitter Paper; Smoky Slate Classic Ink; Mini Silver Brads; Sticky Tape; and Dimensionals.
 
I changed the background designer paper on this one (not sure which one I like better -- how about you??)
 
And of course I had to try a Shabby Chic look by misting and scrunching my bow and then adding some Vanilla Shimmer Smooch Spritz (doesn't show up well in the picture, but very pretty in person).
 
I would love to know what you think of my swaps -- I never feel they are worthy enough to swap with others who have such amazing designs.
 
 
Until next time,
Sandi
 
"A man's heart plans his way, but the Lord directs his steps."  -- Proverbs 16:9
 

Wednesday, March 6, 2013

VINTAGE SCRAPS!!

Last week I decided to get out my designer paper scraps and do something with them.  My other goal was to get some gift packaging done so I wouldn't have to create something at the last minute, which is the "usual" for me.  So putting those two goals together, this is what I came up with:  two gift boxes to hold cards, tags for the boxes, and two pillow boxes to hold little gifts.  Sounds easy -- but with all the boxes I have made, I had never gotten around to making a regular gift box to hold at least ten cards and envelopes.  Plus, I thought I owned the pillow box die only to find out I had never bought it and it is now a discontinued product from Stampin' Up! 

So, I decided to use up some toilet paper rolls that I had been saving for another project to make my pillow boxes.  First problem fixed!!  Next I sat down and did the math to make my card boxes for standard A2 cards -- so easy peasy with Stampin' Up's Simply Scored Scoring Tool!!  Wahoo, all problems fixed and here are the finished projects.

Main Stampin' Up supplies used are the Fan Fair Designer Paper; Riding Hood Red Card Stock; Basic Black and Riding Hood Red Ink; Petite Pocket Bigz XL Die; Linen Thread, Victoria Crochet Trim, Vanilla Flower Trim, and Pink Pirouette Two-Tone Ribbons; Silver Soda Pop Tops; Crystal Effects; White Creped Filter Paper (large flower); and  Pretty Petites Sale-A-Bration and Postage Due Stamp Sets.
Don't these toilet paper rolls make cute pillow boxes (recycle, recycle, recycle!!).  This card box was made for a male gift.  Believe it or not, males love to receive a box of cards so they won't have to shop!!  Same products were used except I used the Sale-A-Bration Island Indigo Sycamore Street 1/4" Ribbon and Island Indigo Card Stock.

Close-up of the back/inside of tag. 
 
Close-up of the front of tag -- which is terribly out of focus!!


Pillow box close-up.


This is my favorite!!  I cut the ribbon in half as it was a little too wide for this box.


Picture of the box lid before adhering sides.  And to save you time here are the measurements for the box (if you don't already have): 
Top Lid of Box:  Cut 6 7/8" X 8" piece of designer paper.  Score 1" on all 4 sides and crease on score lines.  Cut the 4 corners as show in the picture above and apply Sticky Strip on the front side.  Adhere the 4 corners to finish the lid.

Bottom of Box:  Cut 7 3/4" X 9" piece of card stock.  Score 1 1/2" on all 4 sides and crease on the score lines.  Finish directions as written for top of box.

Until next time,
Sandi

"I remember the days of old."  -- Psalm 143:5
Fellowship with Christ is the secret of happiness now and forever.