Saturday, July 20, 2013

2013 STAMPIN' UP! CONVENTION: DAY 3

Well the party is over!!!  One of the most awesome conventions I have ever attended.  Every day was a new party, new product, awesome demonstrations, so many prizes, so much excitement, so many friends that I haven't seen in a year, and so many new friends!! 

Today was especially awesome for me because I was one of 25 attendees to win a $100 shopping spree from only playing one game last night at the 25 Year Celebration Party!!!  WOO HOO!!!!  Can't wait to get home so I can shop through the catalogs.  Everybody at convention won a prize patrol, everybody received a prize every day at General Session, and then there were more prizes handed out at the Opening Social and Celebration Party!!  We work for the best direct sales company there is, so get on board and join my team -- you will never regret it, I promise!!

Today I want to show you pictures of Shelli's presentation projects and some of the projects on the boards:

Shelli's projects -- so beautiful in person.  Sorry I couldn't get pictures of the fronts, but they were on the display board like this.

Another project done by Shelli.

Projects using the new Undefined Stamp Carving Kit (we all received this kit to make our own stamps).

Sorry I don't know who did the rest of these pictures as they were on the display board.


Swap card I thought was beautiful.

Another Swap card I thought was beautiful.

And one last Swap card I thought was beautiful (I'll show more later).
We surely have very talented demonstrator artists -- so many beautiful projects.

Well, I have about 4 hours before I have to get up to go to the airport and still have to shower and pack, so until next time, Sandi

2013 STAMPIN' UP CONVENTION (CONTINUED)

Another awesome day here at convention!!  I won prize patrol right of the bat -- which totally surprised me!!  Awesome demonstrations of our new product (wait until you see the new stuff!!).  Played with our new "UNDEFINED" stamp carving kit -- way too cool!!  Everybody attending convention received one to play with, and everybody at home can start ordering now!!

But really, really most awesome new tool coming out in August will be the new envelope maker!!!  This will fly off the rack immediately, so get yours first before it is on back order.  I love, love, love it!!!

It is 1 A.M. in the morning (Saturday), and I'm really getting tired so this is going to be another short post as I have to get up no later than 6 a.m.  Here are a few more pictures of the home office.  Right-click on the pictures and select "open in new tab/window" if you want to see close-up.


Notice the rosette circles on the mantel -- adorable!!


I would love to have everything in this room!!!


These are made with designer paper and are huge hanging down from the ceiling.
Come back tomorrow for more pictures -- I will have pictures of what Shelli created on stage!!

Until next time,
Sandi

Friday, July 19, 2013

2013 STAMPIN' UP CONVENTION: RIVERTON TOUR

Good morning from Salt Lake City!!  I have 5 minutes before Lynn and I leave for Friday sessions, so thought I would hurry and post some pictures from Stampin' Up's Riverton tour yesterday.  I will post more tonight.

Lynn and Eleanor out front of the entrance.

Atrium inside.


So beautiful in person -- all Stampin' Up cardstock!!

And of course I love this!!!

Front of the office building.

Gorgeous in person -- stained glass technique!!
Gotta leave -- so sorry this is so short.  I promise there will be more!!

Until next time,
Sandi

Friday, July 5, 2013

STAMPIN' UP GRUNGE AND WASHI TAPE!!

Yes, I'm still alive and functioning!!  Even though I have been debating with myself this last month as to whether it would be easier to move to a new home or to continue cleaning 30 years of "stuff."  Yes, I do clean on a regular basis, but for some reason I got it in my head to obliterate every piece of dirt and dust in my house before my grand-daughter's Open House in 8 days. Now that I am down to crunch time, I realize that is not going to happen (and as my husband keeps reminding me -- who cares???).  I keep telling him that "I care," but he just doesn't get it.  I just keep telling myself that Stampin' Up's 25th Anniversary Convention is right after Open House and I can go knowing that if the plane goes down, I won't be too embarrassed because my house will be clean (cleaner?).  Why are women like that?? (E.g., like my mom always said, "Make sure you have clean underwear on in case you have an accident."  I'm sure not many men think of this.)

I did squeeze in a couple of hours this week to make 50 Convention swap cards and a couple more album pages for my grand-daughter:

I am so in love with Stampin' Up's new Washi Tape!!  After making 50 swap cards with the new Gingham Garden Washi Tape, I still had over half a roll of each left over (talk about economical!!).  Plus it is so forgivable if you have to reposition.  I used the Simply Sketched Stamp Set, water coloring with the Melon Mambo and Old Olive Classic Inks, using the Aqua Painter.

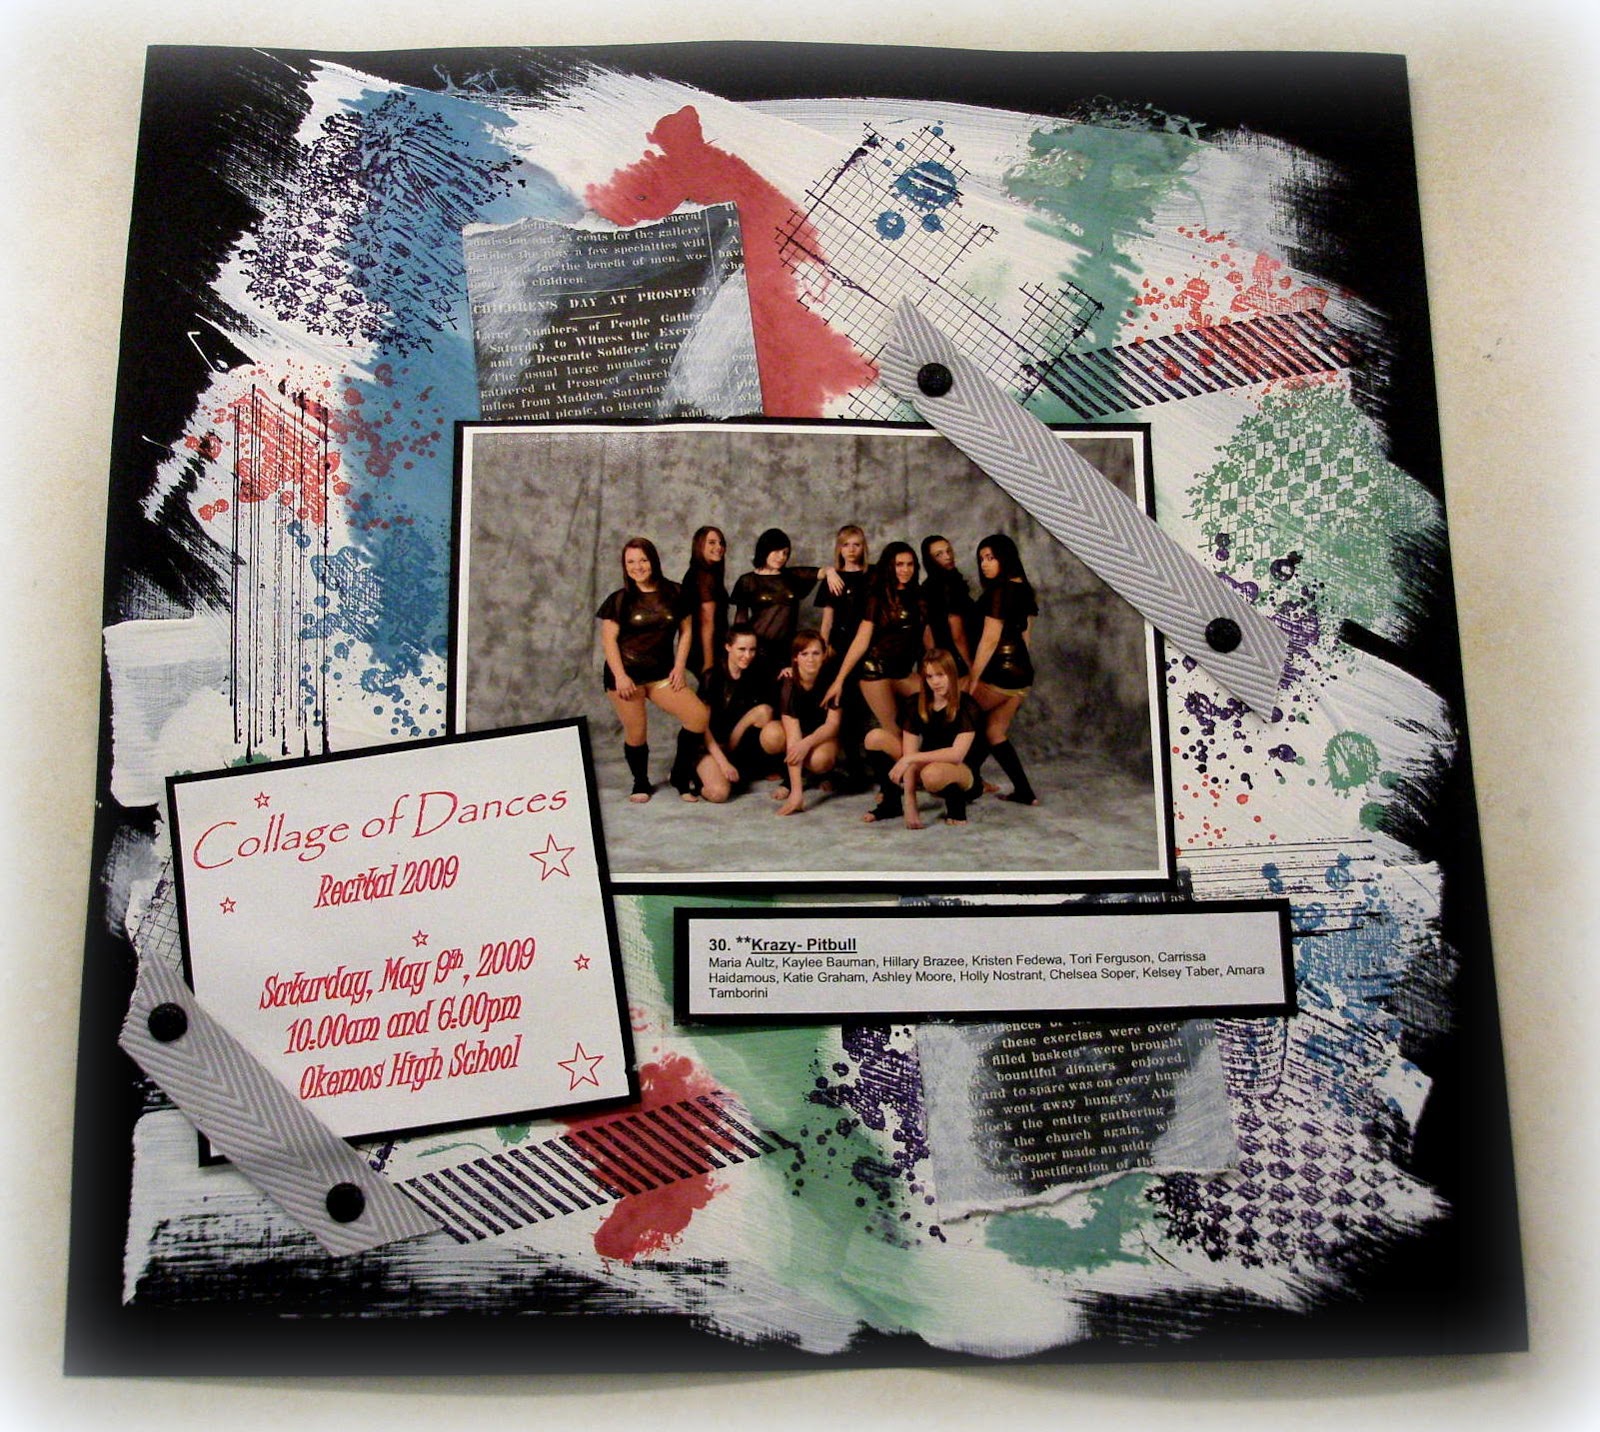
Yep, this page is not for everybody -- but it works for the person I made it for, and was so much fun to put these pages together.  I love the new "grunge" style of art (hard to believe when everybody knows I love Vintage and Shabby Chic).  But to me it is basically the same, just different stamp sets and backgrounds.  It's all about texture, layering, and lots of color!!  The texture shows up better if you enlarge these picture by right-clicking and selecting "open in new page."

How did I do it?  I applied Gesso on Stampin' Up's Basic Black card stock, let it dry if you choose (I didn't on the page above and got a completely different look with the ink), apply ink refill, let I dry, add designer paper, then stamp away!!  You can't see it in the pictures, but there is lots of texture.

Here are the 2 pages together.  Notice the difference on how the ink refill bled out on right page when the Gesso was still wet.  I used the following stamp sets for these pages:  Off the Grid, Gorgeous Grunge, and Clockworks.  Accessories included the new Smoky Slate Chevron Ribbon, Basics Glimmer Brads (Black), and Modern Medley Designer Series Paper.
I am truly interested in your comments on my "grunge art" and constructive criticism on how I can improve.  I haven't seen any samples on blogs yet using our new grunge stamps so your thoughts would be very welcomed.

Until next time,
Sandi

"You have been my defense and refuge in the day of my trouble."  -- Psalm 59:16

Wednesday, June 26, 2013

STAMPIN' UP FLOWER SHOP!!

Sorry about taking so long to post something new, but the truth is, tonight was the first time I had a chance to play with some of my new stamps.  Actually, I didn't really have a "chance" -- I just said enough with washing windows and cleaning house, I'm going to do something I love.  Besides that I am way late getting this thank-you card in the mail.  It is almost to the point where I'm ashamed to even send it (don't think that has ever happened to me before).  I have tons of thank-you cards, but I wanted something "new" and "fresh" to send as it is going to a fellow stamper.  And I just wanted to "let loose with my design" as you can see by the picture. 

I have always been an admirer of Impressionist Art because to me it is like doing shabby chic and now grunge art -- all are expressions of how I feel.  Impressionism.org defines "Impressionism" as a depiction of an artist’s impression. "It does not aim to be accurate in detail, but the impression often elicits a stronger emotional appeal, which is variously triggered in the beholder. It is a spontaneous expression, often discarding the basic ability to draw correctly and becomes more an interplay of colors.  Because it is an impression, every impressionist painting becomes more an expression of the heart."  So here is my card, which is definitely a play on our new in-color inks and totally discards the ability to draw (LOL).  However, it is my impression and from my heart:


My background was created using the direct to paper technique, with a twist.  I used watercolor paper, applied the in-color inks with a plain rubber stamp (mounted on wood), and then misting with water.  Using the watercolor paper added the texture I wanted plus allowed me to mist the ink to set the colors.  Of course I added the petals from the new Flower Shop Stamp Set  (Strawberry Slush Card Stock and Ink) and the leaves cut from the Secret Garden Framelits using Old Olive Card Stock.


And yes, I did get another 12" x 12" double-page layout done for my grand-daughter.  I really thought I was done with her album, but I keep finding pictures I want to add.  Normally I never show non-Stampin' Up product because I don't buy anything but Stampin' Up, but the product on the left page was given to me and it matched the color I was looking for these pictures (I did add some new Washi Tape to it however).  The page on the right is retired Stampin' Up DSP, but current accessories.  I love how I was able to match up the colors on the 2 pages.


Close-up of left page.  This layout I intend to use again with all Stampin' Up product.


Close-up of left page -- notice the use of the new Chalk Talk Framelits.  (Right-click on the pictures and select "Open in new Window" and then click on the picture to enlarge for detail.)
Until next time,
Sandi

"Rejoice in the Lord always.  I shall say it again:  rejoice!" -- Philippians 4:4

Tuesday, June 18, 2013

STAMPIN' UP: BEST OF LOVE AND MORE!!

Whew, what a day!!  I have been seriously getting into cleaning this week to get ready for my grand daughter's Open House in about 23 days.  I saved my spring cleaning until now because I didn't want to do it again for the party (actually, if it gets done once it is only for a party!!).  Today was getting all the baby and kids toys bleached from the toy boxes.  Have you ever washed about 300 McDonald toys with a tooth brush before????  That doesn't include all the little Playschool people, army men, jewelry, play dishes, 25+ stuffed animals, a couple of dolls, large toys, and tons more!!  Trust me, a lot got thrown away, but obviously not enough.  As I am doing all this, I kept waiting for my husband to say, "the grand kids are all grown up, so why do you have toy boxes."  Bless his heart, he never said a word because he probably knew exactly what I would say.  That is, "we still have small step grandchildren, great grandchildren, great nieces and nephews, and others that visit with children."  Besides that, some of the grown up grand kids won't let me because they are still known to play with these toys (these are the same ones that have never forgiven me for remodeling their basement playroom into my studio).  So tomorrow I move on to weeding outdoors (I got the pond done!!) and finish painting downstairs.

So between all that, I did do a couple of projects that I want to show you today.


Another 12" x 12" double-page layout for Holly's album featuring Stampin' Up's This and That Product Suite.

Close-up of left page.  This was such a great layout for using lots of pictures.

Close-up of right page.

Card I made for my husband on Father's Day, but can't show you the inside!!  He really loved this a lot, so much so that . . .


I made about 20 of these without an inside sentiment for Project H.O.P.E.  Simple, but mailable and saying exactly what I want to say.

Until next time,
Sandi

"Do not withhold good from those to whom it is due, when it is in the power of your hand to do so."  --  Proverbs 3:27

Tuesday, June 11, 2013

DIAMONDS ARE FOREVER

A card created last month that I didn't post -- but so beautiful.  This is truly a girly-girl card, that sparkles even with the lights are off (okay, maybe with a candle glowing).  And what girl doesn’t like diamonds?  Of course there was no way I could get all the sparkles to show up with my limited camera skills, but trust me; any girl would love to get this card in the mail:


You really need to right-click on this card with your mouse and select "open in new window" to see the sparkle and shine.  I totally love this card!!  It looks like a hard card to put together but it really isn't -- see directions below.


PRODUCT USED:
(Note:  Some of this product is now discontinued; i.e, card stock color & embossing folder, but just switch with current SU product.)
Stamps:  Parlor Prints Background and Teeny Tiny Wishes.
Card Stock:  Rose Red, Very Vanilla, and Basic Black.
Ink:  Rose Red Classic Ink and Illuminate Pigment Ink.
Tools and Accessories:  Dress Up Framelits; Vintage Wallpaper Textured Impressions Folder; Iridescent Ice Embossing Powder; Embossing Buddy Static Remover; Heat Tool; Brayer; Rose Red Marker; Vanilla 5/8" Flower Trim; Rose Red Seam Binding; Rhinestone; Word Window, Modern Label, and Little Labels Punches (½" tiny postage stamp cut in half).

DIRECTIONS:
  1. Cut 4 ¼" x 11" card base from Rose Red cardstock; fold in half.
  2. Cut 4 1/8" x 5 5/16" piece of Very Vanilla cardstock and emboss with Vintage Wallpaper folder.
  3. Use Illuminate Pigment Ink to brayer over the embossed Very Vanilla layer.  Use heat tool to dry before adhering to base of card (Rose Red).
  4. Use a 2" x 5" piece of Rose Red cardstock to run the Dress Form framelit through the Big Shot.  Cut the bottom part of the dress form so you have two pieces.  Attach top half of dress form to Very Vanilla layer.  Set aside the bottom half until your dress is made (see #12).
  5. Cut 2 pieces of Basic Black cardstock:  (a) 4" x 2 ½" and (b) 4" x 3" and run through both pieces in Big Shot using dress framelit to make the dress.  (The smaller Black cardstock piece is for the bottom of the skirt only.)
  6. Use Embossing Buddy on both the dress and skirt, and then stamp with the Parlor Prints Background Stamp inked with Illuminate Pigment Ink.
  7. Quickly apply Iridescent Ice Embossing Powder and set with Heat Tool.
  8. Attach the skirt bottom under the full dress with Sticky Strip.
  9. Wrap dress waist with Rose Red Seam Binding and make small bow.
  10. Cut one rose from the Vanilla Flower Trim and color with the Rose Red marker.
  11. Attach rose flower to the bow using Mini Glue Dots.
  12. Attach dress to the dress form with the previously cut bottom piece of the dress form positioned under the skirt.
  13. Use a scrap of Basic Black cardstock (that was stamped and embossed like the dress), to punch with the ½" postage stamp from the Little Labels Punch Pack. Cut diagonally across the square to make a diamond shaped neck choker with a diamond rhinestone in the middle.  Adhere to the neck of the Dress Form.
  14. Punch Rose Red cardstock with Modern Label Punch.
  15. Stamp "Thinking of You" (from Teeny Tiny Wishes) with Rose Red Ink on Very Vanilla cardstock, punch with the Window Punch, and adhere to Rose Red punched cardstock.  Adhere sentiment to the bottom-right corner and trim off excess.
And finally, additional pictures from my daughter's "You Are . . ." squash book album (see previous posts for other pictures):


Until next time,
Sandi
"He who glories, let him glory in the Lord."  --  2 Corinthians 10:17