Showing posts with label Canvas. Show all posts

Tuesday, June 24, 2014

BLOOM WITH HOPE MEETS MIXED MEDIA CANVAS

I had a fun afternoon yesterday creating something new for me, which I have wanted to do for over a year.  I purchased 4 canvas frames almost a year ago with a gift certificate that was soon to expire, with the thought of incorporating my love of Stampin' Up! product on canvas using mixed media.  I thought this would be the perfect time to try it out because Ronda Wade, our RubberQueen leader, challenged us to use Stampin' Up Designer Series Paper on a few projects for our July meeting.  You know how much I love a challenge, and I'm so glad she gave it or I would have never put my thoughts on this canvas.  I love how it turned out mixing Stampin' Up's vibrant ink colors with their gorgeous designer paper.  And yes, it did take me the whole afternoon to finish it because the mediums had to dry in between the creativity and I started with just an idea to use designer paper. 

A lot of my inspiration for mixed media comes from Ronda Palazzari, a well-known mixed media artist, author, licensed designer, instructor and avid memory keeper who enjoys all kinds of mediums.  Her artwork has also been published in several magazines and idea books.  I have been following her blog for a couple of years and love her style because it is so different than mine!! A while back she sent me her first book, published in 2012, Art of Layers; which was my inspiration for today's project.

Check out Ronda Palazzari's blog here.
Here is what I came up with for my very first mixed media on canvas (yep, I will never be a Ronda Palazzari but I still love it) with directions:

My art is not for everyone; but I love to just "jump out of the box" every once in a while.  If you want to see a larger picture showing the texture, just right-click on the image and select "open in new window" and then you can click on it to enlarge.


Product Used:
Stamps:  Bloom With Hope (Hostess Set) and Feel Goods
Inks:  Lost Lagoon, Old Olive, Daffodil Delight, Hello Honey, Strawberry Slush, StazOn Black, and Momento Tuxedo Black
Designer Series Paper:  All Abloom Designer Series Paper Stack
Accessories:  Very Vintage and Vintage Faceted Designer Buttons; Strawberry Slush Thick Baker's Twine; Lost Lagoon Stitched Satin Ribbon; Daffodil Delight Blendabilities; Hexagon Hive Thinlits Dies; Old Olive Ink Refill; Sponges; Crystal Effects; Tissue Paper; foam paint brush and small bristle paintbrush; Gesso; and Mod Podge.

Directions:
  • Using the foam paint brush, spread the Gesso over the entire canvas to give it texture.  Add a small piece of the All Abloom DSP on top of the gesso (while still wet) and smooth it with the foam brush and let it dry. 
  • Sponge on the different colors of ink and let it dry. 
  • Using scrap cardstock, run the Hexagon Hive Thinlit through the Big Shot and use it as a template to sponge on the Old Olive ink (and I used the same sponge to lightly wipe the color around the hexagons). 
  • Mix together about a teaspoon of Gesso with Old Olive Ink Refill for desired color; and using a bristle paintbrush, paint the outside frame and create some "splatters" on the front of your canvas. 
  • Using the StazOn Black Ink, stamp your sentiment on some white tissue paper, tear around the words, apply some Mod Podge on the back using foam paint brush, and apply to canvas being careful not to tear.  
  • Using the Momento Tuxedo Black Ink, stamp your flowers and leaves on the designer paper, cut, and apply Mod Podge to back to adhere to canvas (I did use my tweezers for the leaves).
  • Color one button with the Daffodil Delight Blendability and adhere designer paper to back of the other 2 buttons using Mod Podge.  Let dry and then tie on baker's twine and Lost Lagoon ribbon (I cut this lengthwise at 1/8th inch wide so it would go through the small button holes).
  • Adhere the buttons to the canvas using Crystal Effects.
  • Using a sponge, I applied some Lost Lagoon ink on the frame sides.
I have probably forgotten something in the directions, but if you have any questions leave a comment and I will check back to answer.  Let me know what think of my first attempt!!

Until next time,
Sandi
"I have come as a light into the world, that whoever believes in Me should not abide in darkness."
--  John 12:46

Sunday, September 23, 2012

STAMPIN' UP MIXED MEDIA CANVAS

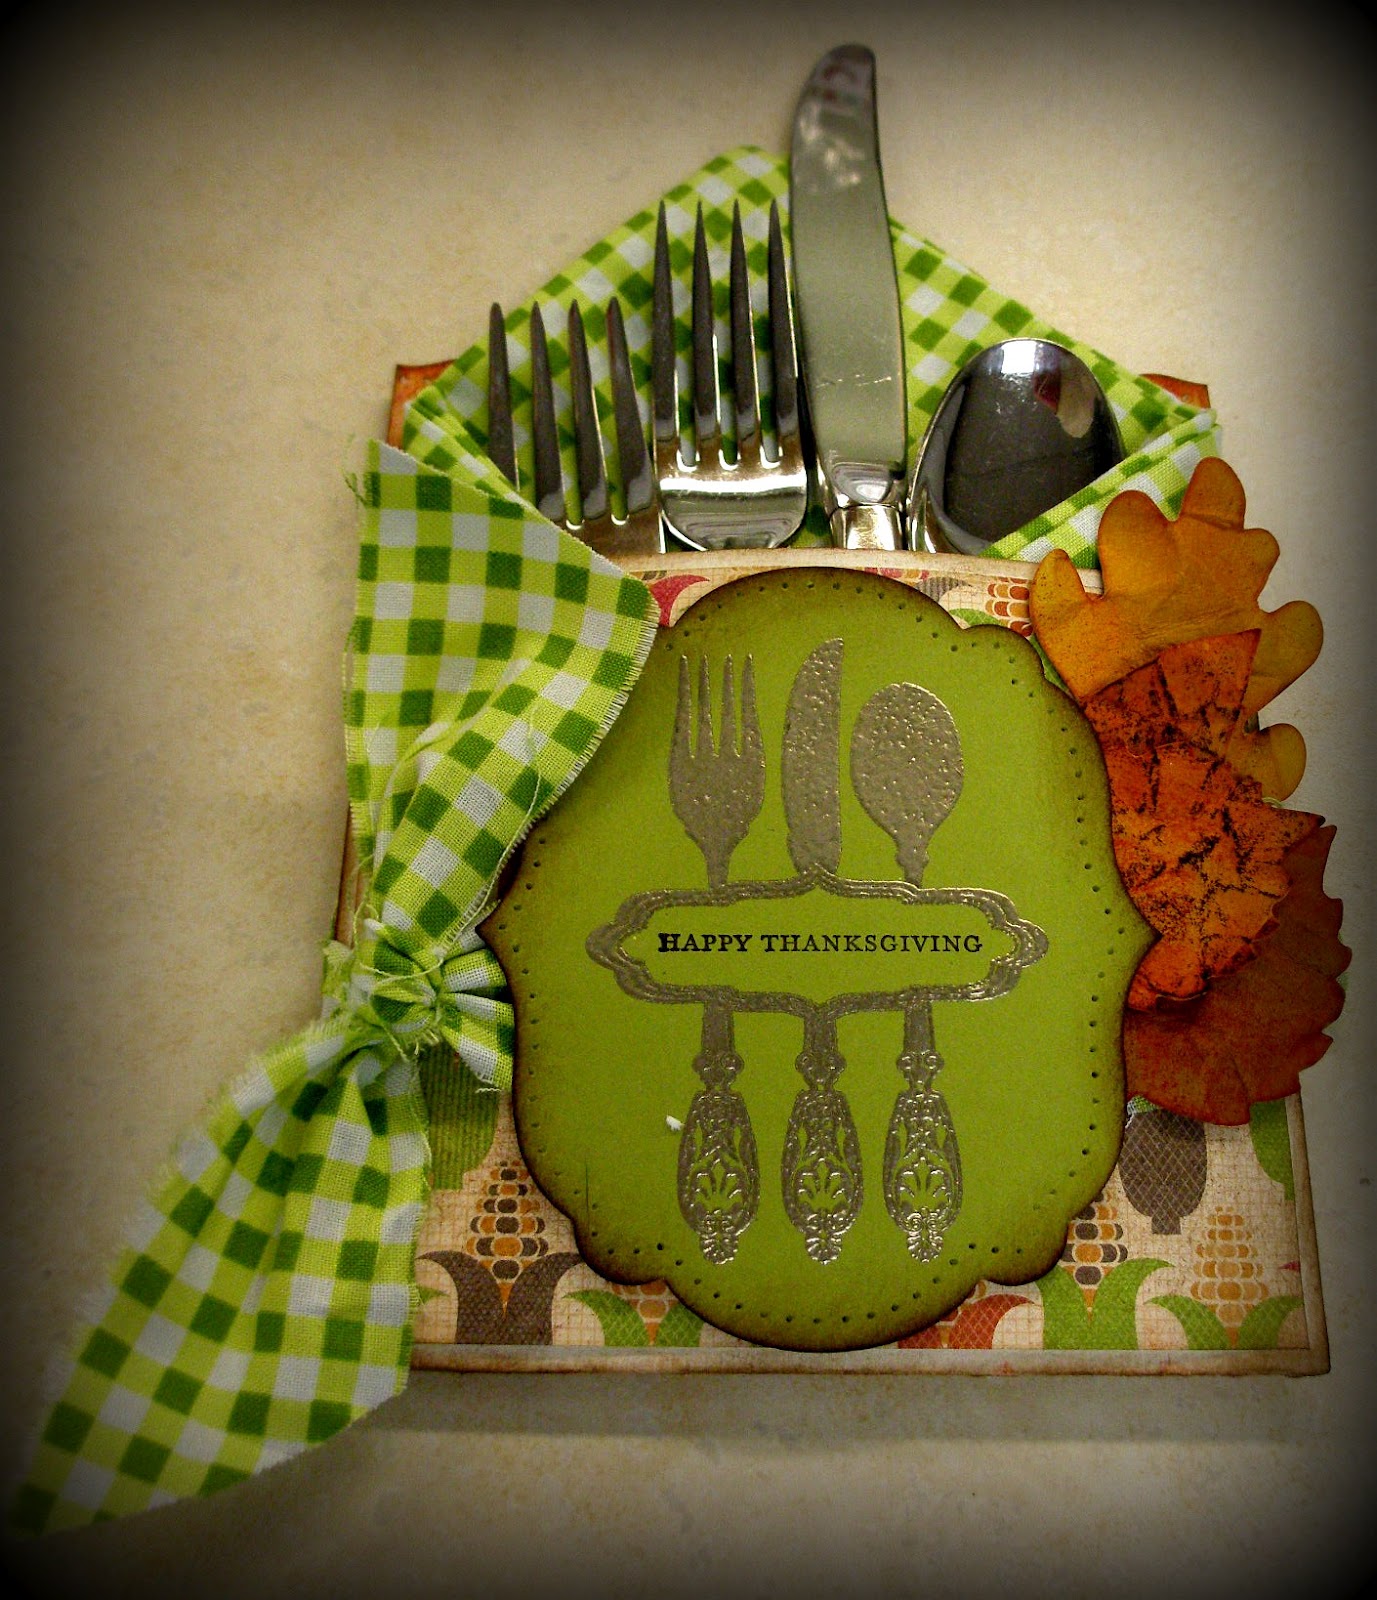
I have a lot to show you today, so I am going to jump right into this update.  First, a couple of pictures of more Fall projects.  I also had quite a few requests for directions on how I made my table setting (see prior post), so at the end I have provided the measurements and short directions on how to put this together (very, very easy). 

At Stampin' Up 2012 Convention I attended a class where we decorated this canvas with designer paper.  After getting home, I decided I didn't like the style at all so I ripped everything off and started completely over to design a mixed media canvas.  The base of the canvas was first painted with blue acrylic paint (at convention), so I kept this the same.  This is what I came up with.  I used a lot of stamps, designer paper, card stock, sponging, and a Precision File (from SU's discontinued Distressing Essentials Kit) to file off the designer paper to make the clouds.

Sorry about the color quality of  this card (too lazy to retake picture).  The pumpkins actually have more color in real life.  Product used:  Full of Blessings Stamp Set, Watercolor Wonder Crayons, Apothecary Framelits. Essentials Paper-Piercing Pack, Naturals Ivory Card Stock, Cherry Cobbler Coor'dinations Card Stock, Vintage Wallpaper Embossing Folder, and (Gold) Basics Glimmer Brads.
 Now for some directions on making the table setting holder:


1.    Start with 8" x 11" piece of card stock (use color to match your designer series paper). 
2.    Lay card stock on Simply Scored tool so that 8" width is at top and score at ½", 1", 1 ½",
 6 ½", 7", and 7 ½". 
3.    Turn card stock 90 degrees so that 11" width is at top and score at 4 ¼" and 8 1/2".  
4.    See picture of finished, scored card stock above, and cut away the areas darkened.
 
5.  This is what it should look like after cutting and creasing the score lines.

6.  Turn it over so you can apply Sticky Tape, as shown above.

7.  Turn it back over and fold up to adhere sides and decorate as you wish.

This is how I decorated mine, but I can envision so many different designs for whatever theme you want (Christmas themes would be awesome!!).
Let me know if you have any questions on these directions.  Please note that you can save these directions as a PDF if you click on the "Print in PDF" button below.  Just follow the directions on the dialog boxes when they pop up (you have the option of deleting text you don't want to include).

Until next time,
Sandi

"God is our refuge and strength, a very present help in trouble."  -- Psalm 46:1
Thank you, Father, for giving me the friends I need when I need them.