Monday, October 24, 2011

SUNFLOWER SEASON

Yikes, I guess I am a little behind on updating my blog!!  Sorry about that, but things just kept getting in the way.  I had an awesome weekend of stamping with all my friends in my stamping class.  Did my first Christmas Stack class for the year (yeah, yeah -- I know I started a little late this year).  But that seems to be my middle name lately, "late."  Sorry I'm not showing pictures of the cards today because I still have pictures from my Creative Convention presentation on "Background Stamps."  Today I have a few using the awesome new Sunflower Background Stamp and my shoebox swap. 

I paired the Sunflower Background with the Alway Grateful Stamp Set here. Accesories:  Cajun Craze 1 1/4" Striped Grosgrain Ribbon and Vintage Eyelets.
 
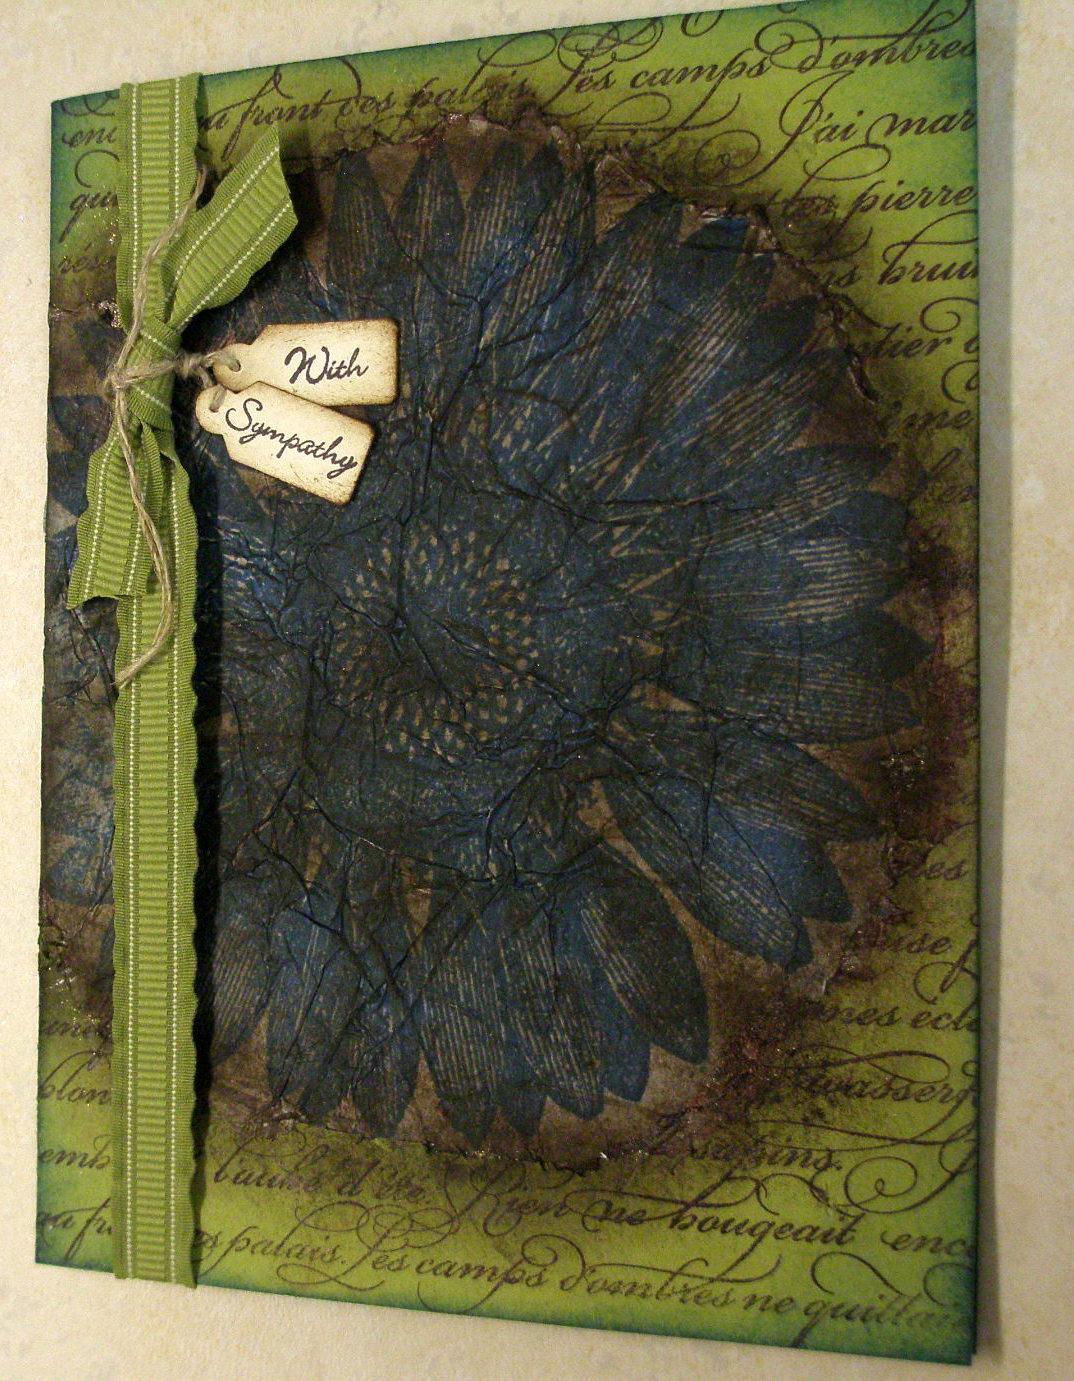
The Sunflower Background Stamp was paired with the En Francais Background Stamp.  The Sunflower was stamped on tissue paper in Not Quite Navy Classic Ink and sponged with Soft Suede Classic Ink.  Accessories:  Lucky Limeade Ruffled Ribbon, Linen Tread, Jewelry Tag Punch, and Anywhere Glue Stick.
 
I don't think you can get anything more simplier than this card -- it is literally a 1-minute card including cutting!  The Sunflower Background Stamp is stamped directly on Well Worn Designer Series Paper, in Cajun Craze Classic Ink and the sentiment (from Pursuit of Happiness Stamp Set) is stamped in Early Expresso Classic Ink.

I decided to do a bookmark for the Creative Convention Shoebox Swap as I had a lot of the plastic inserts left from a purchase I made a couple of years ago.  Supplies:  Always Grateful Stamp Set; Pizzazz and Confetti White Cardstock; Spice Cake Designer Series Pape; So Saffron, Marina Mist, and Wild Wasabi Markers; and Pear Pizzazz Classic Ink swipped direct to paper using blank rubber stamp. 
I hope you like!  Probably only two more posts and I will be done showing you my projects from Creative Convention presentation -- so bear with me.

Until next time,
Sandi
"Lo, I am with you always, even unto the end of the world."  -- Matthew 28:20
"Lord, thank You for the ways You reveal Yourself to me, even when I'm not paying attention." -- Gail Thorell Schilling

Sunday, October 16, 2011

ANCESTORS WITH BACKGROUNDS

LOL, how do you like that title?  Of course I am still showing you pictures of my projects using background stamps for the Creative Convention.  So technically, it is correct -- just had to throw that little "pun" in my title.  I am just going to plop in some pictures with this update because my show is on in 2 minutes (shows you where my priorities are, doesn't it).  So without any more to-do, here are my album pages using background stamps: 
My inspiration for this layout (on left) came from Page 16 of the Holiday Mini Catalog.  Tami Ackerson had shown me a card she made using this weaving technique, and I loved it so much that I knew I was going to do a page for my heritage album using the weaving.  I incorporated the sample on page 150, of the IB&C, also on this page and the one on the right.

Supplies Used:  Parlor Prints, Sweet Floral, and Wonderfully Worn Background Stamps; Well Worn and Paisley Prints Designer Series Paper; Gently Falling and Letter It Stamp Sets; River Rock, Wild Wasabi, Early Espresso, and Not Quite Navy Card Stock (and some more, but can't remember); and Lace Ribbon Border, Scallop Corner, and Corner Rounder Punches.
  
I used the Cracked Glass Technique on the Sweet Floral panel (embossed in White Embossing Powder).  Supplies:  Same as page on left, plus Heat and Stick Powder, Holly Berry Bouquet Wild Wasabi Button, and Linen Thread.

 As always, click on the pictures to enlarge so you can see the details.  I love to scrapbook, just wish I did it more often!!

Thanks for stopping by, and would love your comments/suggestions.

Sandi
"It is good to give thanks to the Lord . . .."  --  Psalm 92:1
Thank you, Lord, for reminding me of the importance of expressing my gratitude for small favors.

Monday, October 10, 2011

FALL WITH SPICE CAKE

I hope you aren't tired of seeing some more of my projects I made for the Creative Convention.  I told you I had a lot, and I still have enough to show for the rest of my posts this month.  Today I am featuring the Spice Cake Product Suite, along with another background stamp.  The weather and colors of this past week make it the perfect product to showcase.  I just can't get into showing Christmas samples until at least the month before Christmas or there is some snow on the ground.  I think too many of us skip over those beautiful Fall days with all the colors (can you tell it is my favorite time of the year).  I have had these projects done for almost two months, so I am totally excited that I can finally show them on my blog.

This circular box was CASEd from the Holiday Mini Catalog, page 19.  I have never made a circular box from scratch before so it was a challenge for me to do the math.  But got lucky on the first try!!  I used Wild Wasabi Card Stock for the base of the box, stamped with the new Parlor Prints Background Stamp in Not Quite Navy Classic Ink.  Accessories included:  Petite Pennants Builder Punch, 3/8" Twill Tape, On Board Merry Medley Chipboard, Antique Brads,  Brass Eyelets (oops, I thought these were still current), Always Thankful Stamp Set, and Paisley Petals Designer Series Paper.

And here are my fabric pumpkins and card box.  I got the pattern for the pumpkins from Martha Stewart'sWEB SITE (actually have had it for over a year, just didn't get done last year).  These were easy peasy to make.  I used the Spice Cake Designer Fabric, Chocolate Chip Baker's Twine to make the veins on the pumpkins, and some Pear Pizzazz 1/2" Stitched-Poly Ribbon.  See below for box supplies.

The box was made using Stampin' Up's new Stampin' Card Keeper.  I covered the entire box with First Edition Speciality Paper, then stamped the Sunflower Background Stamp on tissue paper with Not Quite Navy Classic Ink, ripped around the flower and adhered to the box with SU's Anywhere Glue Stick.  I then sponged around edges, etc. with Soft Suede Classic Ink.  A piece of the Spice Cake Frabic was tied around the lid and bottom of the box, then flowers made with the Sunflower Background Stamp Set (stamped on First Edition Speciality Paper and cut) were adhered.  There is a Spice Cake Designer Button in the middle of one of the flowers that you probably can't see until you click on the picture to enlarge.
I hope we squeeze in one more beautiful day before the rain starts, but either way enjoy your week!!

Blessings to all,
Sandi

"He will be our guide even unto death." -- Psalm 48:14
"Dear Father, may all our partings be filled with Your peace." -- Karen Barber

Wednesday, October 5, 2011

TISSUE-STAMPED DECOUPAGE VASES

Hello all!!
Today is another quick post because it is really to nice outdoors to be in front of this computer screen!!  We are having some beautiful 70-degree Fall weather here in Michigan.  And the trees are in full autumn color -- love this time of year, another reason I stay in Michigan!! 

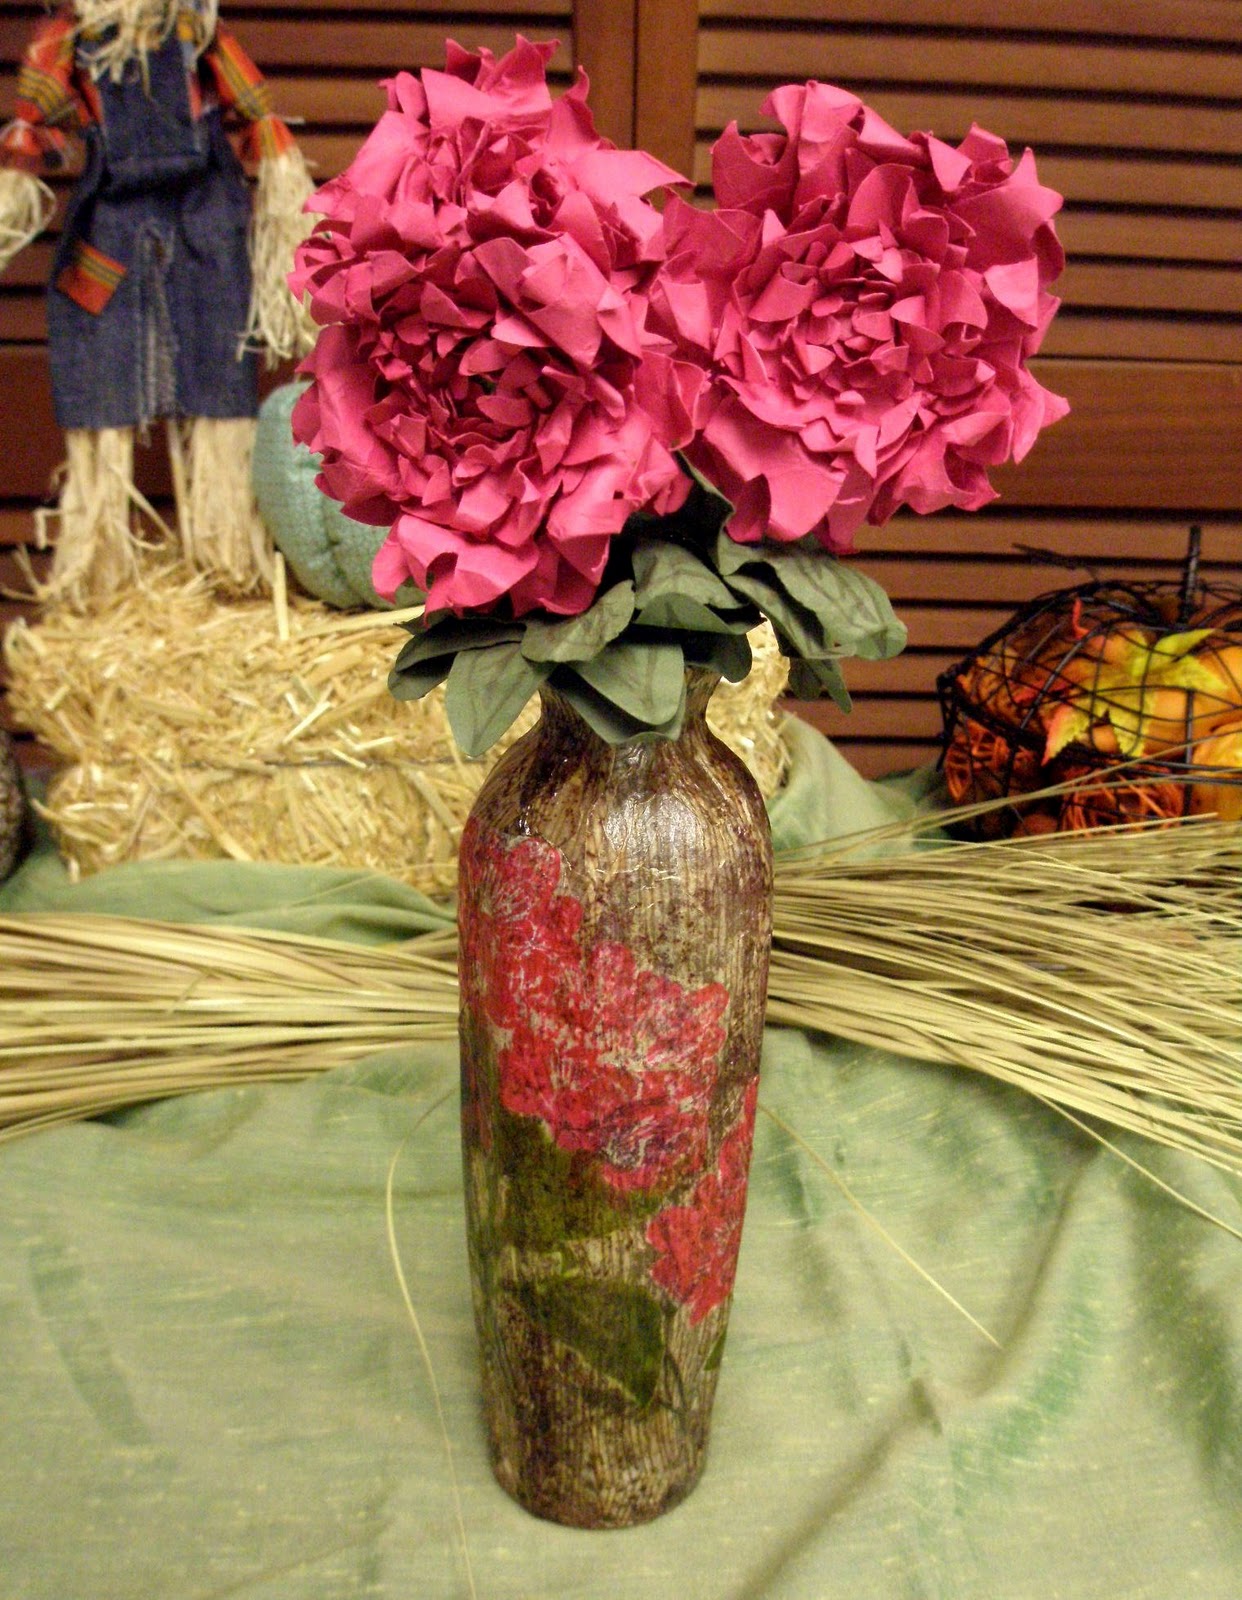
I am posting pictures of my tissue-stamped decoupage vases today.  I totally loved doing these, and could have made tons more, but just not enough time.  The wonderful part about doing these is the fact you will never have any two look alike, so it feels like a whole new piece of art each time you are done.  I had so many demonstrators ask me how I made these at the Creative Convention, so I promised I would include this information when updating my blog.  I have to give Sharon Field a huge thank-you for posting a tutorial on her blog, HERE, with the directions on how to make these.  They are very easy, and very quick.  Another project that the young ones (and teens) would be able to tackle and never have mistakes.  My 16-year old granddaughter begged me to make one after she saw my first vase completed, and absolutely loved making hers (see picture of her finished jar below). 

Make sure you click, or double-click, on the pictures to enlarge as the details really don't show up in these pictures.  This is the first vase I made.  I used the Sunflower, Sweet Floral, Wonderfully Worn, and French Filigree Background Stamps on white tissue paper.  I think it turned out like a Claude Monet, who was a founder of French impressionist paintings.
 
This vase uses the Sweet Floral and Woodgrain Background Stamps.

My granddaughter made this glass urn, using the Sweet Floral and En Francais Background Stamps. She used SU's Markers to color the Sweet Floral.  Didn't she do a great job!! 

This was an old empty candle jar with a lid.  I used the new Hello Doily (embossed in White Embossing Powder) and the En Francais Background stamps, then brayed over the tissue paper in Baja Breeze, and then sponged on some Crumb Cake Classic Ink.


Just another picture showing the jar with the lid removed and how opaque the glass is when applying the tissue paper.

Hope you enjoyed these, and you really need to give it a try because you will love it (you don't need to use a background stamp, but make sure you use a solid stamp as lined stamps don't work as well).

I'll be back in a couple of days with more projects!

Sandi
"Hear O Lord, and have pity upon me; O Lord, be my helper." -- Psalm 30:11
"Thank you, God, for the people who give me a helping hand.  And today, please help me to be a helping hand to someone else."  -- Linda Neukkug

Sunday, October 2, 2011

CREATIVE CONVENTION!!!

Wow, what a fabulous four days I have had!!!  Most of you know by now that I have been preparing projects as a presenter for Ronda Wade's Creative Convention this last weekend.  Well, let me tell you, it was absolutely fabulous.  I learned so much, stamped for 4 days, and made some fabulous new friends as well as getting a chance to really sit down and visit with my old friends.  There were 80+ ladies there, from all over.  From the awesome Canadian ladies, to the large group from Tennessee, and demos in Ohio, Indiana, Illinois, Wisconsin, and my home state, Michigan, we had a great representation of demonstrators from all over.  If I left anybody out, please forgive me and remember that I am a senior citizen!!

So what does this mean to you?  It means you are going to see tons of projects in the next couple of weeks from some very talented stamping demonstrators.  Today is just a warm up -- so trust me, you better make sure you come back every couple of days to check out the rest.  Tons of new ideas for you to try out!!

Today I want to show you our "convention bags" we received as we checked in -- so cute and very durable -- thank you RONDA!!  And then some of the swap cards that were swapped on the night of our Social (when we were treated with a yum, yum chocolate fountain).

Yes, there were even SU product goodies in our bag.  Don't you just love how Ronda designed the bags with the name of her convention, with matching notepads and pens.  And of course, the added WOW was the monogrammed scalloped circle to identify who it belonged to as there were 80+ of these sitting all over the place!! 
 
This was my swap card -- the theme was "Anything With a Stocking."  My layout was somewhat CASEd from Debra Currier, just different colors, technique, etc.  I used the reverse masking technique to make a shim before using the Snow Burst Embossing Folder and then brayed over the top with Whisper White Craft Ink.  Card stock:  Old Olive, Marina Mist, Whisper White, Riding Hood Red, and Letters to Santa Designer Series Paper.  Accessories:  Mini Jingle Bells, Baker's Twine, Rhinestones, and Stocking Builder Punch.

I had to show you this card done by Sheryl Spitzley, from Portland, Michigan -- isn't it gorgeous!!!  You know I love anything vintage!! 

And the winner of the "Anything With a Stocking Swap":  Melissa Davies, of Michigan.  Isn't this just the cutest design you have ever seen!!  The details of this card can be found on her website, at  www.rubberfunatics.blogspot.com
Well, I've had my shower and put on my "Advanced Nighttime Repair Serum" so I guess I am going to try again to see if it works and hit the sheets (it never has worked in the past -- I still wake up every morning looking old, but I'm hoping one day to be surprised).  Please make sure you stop back to see my projects I made for my inspiration table -- a lot of new stuff and techniques!!  I promise there will be something for everybody (especially when I also have over 100 new cards)!!

Thank you for stopping by,
Sandi
"Even in old age they will still produce fruit and be vital and green." -- Psalm 92:14
"Heavenly Father, thank You for the adventures that lie ahead." --  Patricia Lorenz

Friday, September 16, 2011

PROJECT H.O.P.E.

What is PROJECT H.O.P.E?  I'm sure many of you already probably know from reading Ronda Wade's Facebook or Blog posts that she has established a charity. However, it is worth repeating and passing the information on to everybody; hence, my update today is to spread the word.

Project H.O.P.E. (helping other people experience God's love) is dedicated to "helping others in times of need to experience God’s love through prayers, cards, and donations."  To accomplish this goal we need you as part of our prayer and card warrior team.  The Bible says: 

“Give, and you will receive. Your gift will return to you in full—pressed down, shaken together to make room for more, running over, and poured into your lap. The amount you give will determine the amount you get back.” -- Luke 6:38.
After sending out cards the other day, I cannot even put into words how on one hand, I felt pain for those individuals going through difficult times, life-threatening illness, or even death.  On the other hand and at the same time, I felt blessed beyond words because I am able to make just a tiny difference in someone's life by praying for them and sending a card so they can experience God's love in a tangible way.  My gift has returned to me in full and more!!!  Take time today to visit Ronda's Project H.O.P.E. web site (still in the process of being expanded) and join our team.  Let me know if you sign up and/or if you have any feedback/questions or write directly to Ronda.

Here are a couple of the cards I sent last week on behalf of Project H.O.P.E.: 
  
A stamp set I haven't had out in a long time, but perfect for the little guys in the hospital undergoing cancer treatment. Did I mention that this is a good way to use your discontinued SU product?

Another old (but great) stamp set I haven't had out in a long time, using the stamp sanding technique (behind the oak tree).
On a lighter side, I want to share some pictures of what goes on at my place during the summer.  We have so much fun and I'm already missing the picnics and swim days.  And yes, I love to swim and do all of the silly things below when I am swimming.  My plan is to keep on doing this for as long as my body allows me to get around (however, today the bones are really creaking).  So I am now officially announcing the pond is closed for the season.  Let the leaves begin to fall, the pumpkins adorn the house, and the bonfires begin!!!

I accidentally started a bonfire that got a little out of hand.  This picture was taken after it had burned about halfway down).  My granddaughter Holly is helping me with the water buckets.
  
My daughter Tricia (in middle) and some of the grandkids are really enjoying the weather!!
 
Ethan, Tricia, and granddaughter Emily acting like little kids but having a blast. (No, you are not going to see my picture.)
 
The younger grandkids decided the grown-ups were having too much fun so decided to get in on the act with their dad, Ethan.
Have a beautiful weekend!!
Sandi

"It is more blessed to give than to receive." -- Acts 20:35
Lord, thank you for your blessings that enable me to give in your name.  But help me today, Father, to receive in your name as well as give.

Wednesday, September 7, 2011

TRIPLE EMBOSSED MASKED BACKGROUND

Well how about that for a Title!?!?  Okay, I have wanted to do a "double" embossed card for ages, but the technique just wasn't clicking in my head (no surprise there).  Finally, after my 3rd different video, it clicked in my head.  So yesterday for my RubberQueen meeting swap, I decided, "Hey, now that the light-bulb went off and I understand this technique, why not do a "triple-embossed" swap card.  The card was very simple, it took me a lot longer to figure out the correct depth I needed for my shims (I think all Big Shots have a different pressure when rolling your embossing folders through them).  So after taking about 2 hours making all kinds of shims (for different types of embossing folders), it took about 5 minutes to do the actual card.  You can see Sage Kimble's video HERE on how to do double-embossing.  Thank you so much Sage for your great video and making "double-embossing" understandable for even people with a burned out light bulb!!  Here is my card:

Yes, this card is very, very plain!!!  I knew that and tried to add a ribbon or some other embellishment, but every time I did, it took away from the focus of the card -- which was the embossed flower.  So just use your imagination on what it what look like with an embellishment.  For the triple embossing I used the Tulip, Oval Designer Frame, and Flower Garden Embossing Folders.  I also used the Masking Technique (for a frame around the outside and oval in the middle) before stamping the background with the new Parlor Prints Background Stamp.
 
This was one of our Make'n Takes at Ronda's RubberQueen meeting last night:  a telescope snowman card.  I can't believe this is the first time I have made one -- so very cute!!  This is actually one I made this morning because the one I made last night looked like I was drunk (his mouth and eyes -- LOL).
 
Here it is all opened up.

I just had to show you my yearling buck standing right outside my studio door one morning.  It is not unusual for deer to be out there, but it is the first time I have gotten a good picture of a buck.  The sun was starting to go down for the evening -- usually they are here during the morning.  Click on the picture for a larger view -- he had all this fuzzy stuff on his antlers that I couldn't capture with my camera.

I received some awesome swap cards last night, and will be sharing some of those in my next update.

Until next time,
Sandi

"I have showed you kindness, that ye will also show kindness. . . . -- Joshua 2:12
"Help me make the most of all You've given me, Lord." -- Rick Hamlin