Showing posts with label Creative Convention. Show all posts

Wednesday, September 11, 2013

CREATIVE CONVENTION FINAL PHOTOS

Today is the last of my make'n take photos from Ronda Wade's Creative Convention Event.  I finally purchased a picture frame this week for my last project.  When I signed up for this class, I indicated I wanted to make the cards instead of a framed project.  Needless to say, after I saw these 3"x 3" squares behind a glass frame I forgot about doing the cards and decided to frame them.  Don't get me wrong, they also made 9 gorgeous cards -- but the frame is truly gorgeous with all the sparkle. 

There is no way my cheap little camera can capture the beauty and sparkle from Stampin' Ups' new Frosted Finishes Embellishments, Silver Ribbon, and Winter Frost Specialty Designer Paper (love that foil paper!!).  So unless you come to one of my classes -- you will never be able to appreciate this wall decoration.  I also have a few of the Halloween make'n takes to show you.  Ronda always comes up with fabulous designs for our make'n takes.  So here they are:

I couldn't find a 12" x 12" frame like Ronda's that I liked, so I ended up getting the 13" x 14" frame above.  The frame was white, and I painted it with Island Indigo Classic Ink Refill mixed in white Acrylic paint, but it just didn't come out the color I wanted.  So I will probably take off the color and go back to white -- what do you think?
Okay, it's the next day and I had to edit this post.  I couldn't stand that picture above any longer and removed a lot of the color on the frame.  So which one do you like better?  (#2 below is my pick):

The coloring is still not accurate (the background is really Whisper White -- just looks darker).  A little bit of glare is showing and none of the bling really shows up -- darn camera skills!!  You can probably see better if you right-click on the picture and select "open in new window" for the larger view.  But I definitely like the frame better.

Isn't this just the cutest treat holder?  I see I forgot to trim my Baker's Twine before I took this picture.  I'm too lazy to go back and take another picture, so just use your imagination of how pretty it is now that the tails are trimmed.

Simple, but so cute -- love the Washi Tape!!  I just found out today what the word "Washi" means:  "WA" means Japanese and "SHI" means paper.  The things I learn when I'm ordering tea canisters on-line!!

Creepy, but so cute!!
Now that I finally have all my new stamps mounted and organized, I hope to have some of my own designs to post next time. 

Until next time,
Sandi

"Life is good when you walk with God!"

Thursday, August 29, 2013

STAMPIN' UP CREATIVE CONVENTION: MAKE'N TAKES #1

Finally got all my make'n takes from Ronda Wade's Creative Convention organized so I can show you all the awesome projects we made.  Of course, I won't be able to show you all 24 projects today, so stay tuned for future posts.  I arrived at the hotel on Thursday night to participate in a swap with 40 other ladies.  I can't wait to show you some of the adorable cards we made.

The mini Stampin' Up Creative Convention started on Friday, bright and early, with inspiring and invaluable presentations from top-ranking demonstrators in Canada and United States.  I cannot go into detail but can say, there is no way a demonstrator could leave this event without knowing how to run a very successful and profitable business.  By the time I left on Sunday afternoon, my brain (and notepad) were overflowing with ideas!!

These make'n takes were designed by Ronda, with a few alterations by me.  The idea behind each make'n take was to give us ideas for classes we could give when we returned home using product from Stampin' Up's new Holiday Mini. 

These projects could be offered as a packaging class, using different types of packaging from the Holiday Mini.

I stamped the back of the Mini Muslin Bag above with the Santa's List Stamp Set as an added touch.

Mini gift card designs for a class making 20 with envelopes.  I added the envelope liners, glitter paper, and Dazzling Diamonds because I love "bling."

A card class using one of the new wooden stamp storage boxes to hold your Christmas Cards.

Christmas Cards included with the class above (storage box).
All of the above projects are very simple to create and duplicate for classes, but are packed with a WOW factor.  I loved all of them and hope you do also.  More to come!!

Until next time,
Sandi

"Walk worthy of the Lord."  --  Colossians 1:10

Monday, September 10, 2012

WONDERFALL FALL!!

No, technically I did not drop off the face of earth, but physically I did!!  I know it has been a month since I last posted, but I hope you all come back to visit me and leave a comment to let me know how you are doing.  It truly has been a whirlwind the last 30 days (I think I packed 6 months into it).  So many big parties and lots of family fun, but I'm so glad it is over.  Will I do it again, hmmmm -- probably so.

I left last Thursday to attend and present at Ronda Wade's Creative Convention that ended on Sunday.  All I can say is:  WOW, WOW, WOW!!!  This is the 2nd time she has had this event, and let me tell you, you would have thought she had been doing this for years.  My brain is bursting with creativity and business tips/ideas!!  And so much fun visiting and laughing with fellow demonstrators from Canada, Kentucky, New York, Illinois, Ohio, Michigan and probably many more states.  So guess what projects you will be seeing for at least the next month?????  Yep, pictures and some directions from my presentation.  Ronda asked that I prepare Fall-themed projects; concentrating on the Wonderfall Stamp Set, Autumn Accents Bigz Die, and Orchard Harvest Designer Fabric.  And of course, I threw in some other stamps and accessories from the new Stampin' Up Holiday Mini.  So here are a couple of pictures:

First, I have to thank Ronda's daughter Erica for giving me one of her Barbie dolls and a huge thank you to my sister Pam for doing the actual sewing (I only designed it, she did the hard work).  This was made using the fabulous Orchard Harvest Designer Fabric, Victoria Crochet Trim, and Island Indigo 3/8" Ruffled Ribbon.  I made the basket with Island Indigo Card Stock and Ruffled Ribbon and matching Designer Printed Brads.  (I will post directions on how I made the basket in a future post).

Here is a side picture of dress and basket.  I have to tell you, even though the product I was assigned did not allude to "vintage" projects -- I still had to squeeze in the Victorian Era doll because you know how much I love vintage!!  And of course, let me not forget all those leaves made with the fabulous new Autumn Accents Bigz Die (learned some tricks on making these).

Card features the Wonderfall Stamp Set.  I used the reverse masking technique, with Stampin' Up's Watercolor Wonder Crayons.

I left the Convention early so I could attend my granddaughter's baby shower, which I was co-hosting with my daughter (yep, I'm going to be a great-grandma!!).  So before I leave, I want to show you a couple pictures of projects I did for her shower:

Of course I used some Stampin' Up product for this cute table centerpiece:  retired ribbon and Dazzling Details on the edges of the flower petals (yes, it is hard to see in this picture but looked gorgeous in real life or if you enlarge the picture by right-clicking on the picture and select open in new tab/window).  These flowers were made out of plastic spoons!!!

A close-up showing the Dazzling Details better.

A simple thank you note card for the table favors (sorry, forgot to take picture of inside).
Thank you for stopping by, and come back soon as I have a lot of projects yet to show.

Until next time,

Sandi
"Ye are the light of the world. . . ."  --  Matthew 5:14
"Father, let my attitude light the way for happy times -- anywhere You choose to send me.  -- Pam Kidd"

Saturday, November 12, 2011

VINTAGE BACKGROUNDS

Well today is your lucky day!!!  Yep, I am posting the last of my cards I made for Creative Convention.  You will remember, my assignment was to showcase background stamps for my presentation.  (Of course, I gave the assignment to myself because I love using Stampin' Up's background stamps.)  I am so glad that Stampin' Up still comes out with new backgrounds every year.  I was afraid we were going to loose them with all the marvelous Big Shot Embossing Folders (which I consider in the same category as Background Stamps).  Females love to have it all you know -- kinda like shoes and purses, you can never have too many.

Speaking of "never having too many," I found out that men have this same problem -- at least my man does!!  My husband has this habit of going to the grocery store (mind you, I do all the grocery shopping and cooking -- so don't know why he needs to get in the grocery isles) and buy 5-10 of the same items.  It drives me bananas because I have very little cupboard space, so I end up having to store groceries in the spare bedroom closet.  At any given time you will see 10 jars of pickles, mustard, boxes of cereal, doggie treats, etc.  You get the picture.  And the very worse part:  NOTHING WAS ON SALE!!  Now would any woman in her right mind buy something that is not on sale?????????  (Exception of course would be Stampin' Up product -- but that is okay because we have saved so much from buying everything else we need on sale.)

Okay, I hear you.  Here are the cards you came here to see:

I paired the Sweet Floral Background Stamp with the Netting Background Stamp (sorry the picture is a little dark).

Another card using the Sweet Floral Background Stamp Set.  You can't really tell by this picture, but parts of the flower petals and leaves are raised using Stampin' Dimensionals.   I got this idea from a card done by Lynn Pratt.

Another using the Sweet Floral and Netting Background Stamps.  This actually was a throw-away card because when I stamped the Sweet Floral it was way to bright after sponging for a vintage look.  So put it aside and then came back to it a week later and decided to experiment by stamping the Netting Background Stamp on top using VersaMark and the new Pewter Embossing Powder (also for my frame around the sentiment).

This card is a CASE from the Stampin' Up Idea Book and Catalog,  page 125,  adding the Netting Background Stamp.

And my final card to show you (yes, there were a few more I'm not showing because I didn't really like them).  Again, I used the Sweet Floral Background Stamp.  This was a last minute card to use up some of stamped tissue paper from the vase made in my previous post.  Just a quick, easy card using leftovers.
I hope you have enjoyed my series on background stamps.  May Stampin' Up keep making background stamps forever.  To me, not having a background stamp is like looking outdoors and there is no sky, clouds, or sunsets.  Yes, we make beautiful cards without backgrounds.  However, we need options (or everything) depending on our moods -- our cards depict the mood we are in or want to portray to others.

Happy Stampin'
Sandi
"You are the light of the world. . . ." -- Matthew 5:14
"Father, let my attitude light the way for happy times -- anywhere You choose to send me."  -- Pam Kidd

Monday, October 31, 2011

HELLO, DOILY AND PARLOR PRINTS

Wow, I survived another great weekend!!!  Twice a year I get to attend Creative Retreat and be pampered, and I love every minute.  However, you can't play without paying.  Attending Retreat means no "sleep."  I mean my gosh, there are priorities when you go to Retreat -- and sleeping is not one of them.  I think I had a total of 6 hours while I was there, and that was a lot more than most of the ladies attending.  I bet Ronda Wade and Melissa Roberts (our hosts) had no more than 4 hours of sleep, and that is being generous.  They prepared awesome make'n takes and the classes were the same.  Great food, games, Halloween costumes, and people attending; along with many other surprises.

However, I know you are stopping by to see what I have created lately, so here are some more of my cards I made for Creative Convention (I promise, only one more post and I will be done showing you these cards).  Today I am featuring the Hello, Doily and Parlor Prints.

If you enlarge this picture by using the "right-click" on your mouse and select "open in new tab," you will see that I have embossed the Hello, Doily Background Stamp with the new Pewter Stampin' Emboss Powder.  I love this new embossing color and hope SU will have it in our new 2012-2013 Idea Book and Catalog next July.  I also used the Delicate Doilies Stamp Set, Brushed Gold Cardstock, and Victoria Ribbon (using Basic Black Ink Refill to dye).
 
This card was inspired by a sample in the 2011-2012 IB&C (page 201), with a few things changed.  You can barely see the Window Pane used, but it is gorgeous in person.

I had a piece of stamped tissue paper left over from my glass votive candle and couldn't bear to throw it away so this is what I did with it.  Hello, Doiley was embossed on the tissue paper with White Embossing Powder.
 
I love the Parlor Prints Background Stamp!!  It screams "vintage" at me.  I have paired it with the Always Grateful Stamp Set.
Again, another use of the Parlor Prints Background Stamp Set paired with the Studio Scetches Stamp Set.
Well I guess it is time for me to get some real work done around here, so until next time enjoy this Fall weather while you can!!

Thanks for stopping by,
Sandi

". . . If he [your neighbor] cries out to me, I will hear him, for I am compassionate." -- Exodus 22:26
"Heavenly Father, give me the grace to know when listening is the best thing I can do for a troubled friend." -- Oscar Greene

Monday, October 24, 2011

SUNFLOWER SEASON

Yikes, I guess I am a little behind on updating my blog!!  Sorry about that, but things just kept getting in the way.  I had an awesome weekend of stamping with all my friends in my stamping class.  Did my first Christmas Stack class for the year (yeah, yeah -- I know I started a little late this year).  But that seems to be my middle name lately, "late."  Sorry I'm not showing pictures of the cards today because I still have pictures from my Creative Convention presentation on "Background Stamps."  Today I have a few using the awesome new Sunflower Background Stamp and my shoebox swap. 

I paired the Sunflower Background with the Alway Grateful Stamp Set here. Accesories:  Cajun Craze 1 1/4" Striped Grosgrain Ribbon and Vintage Eyelets.
 
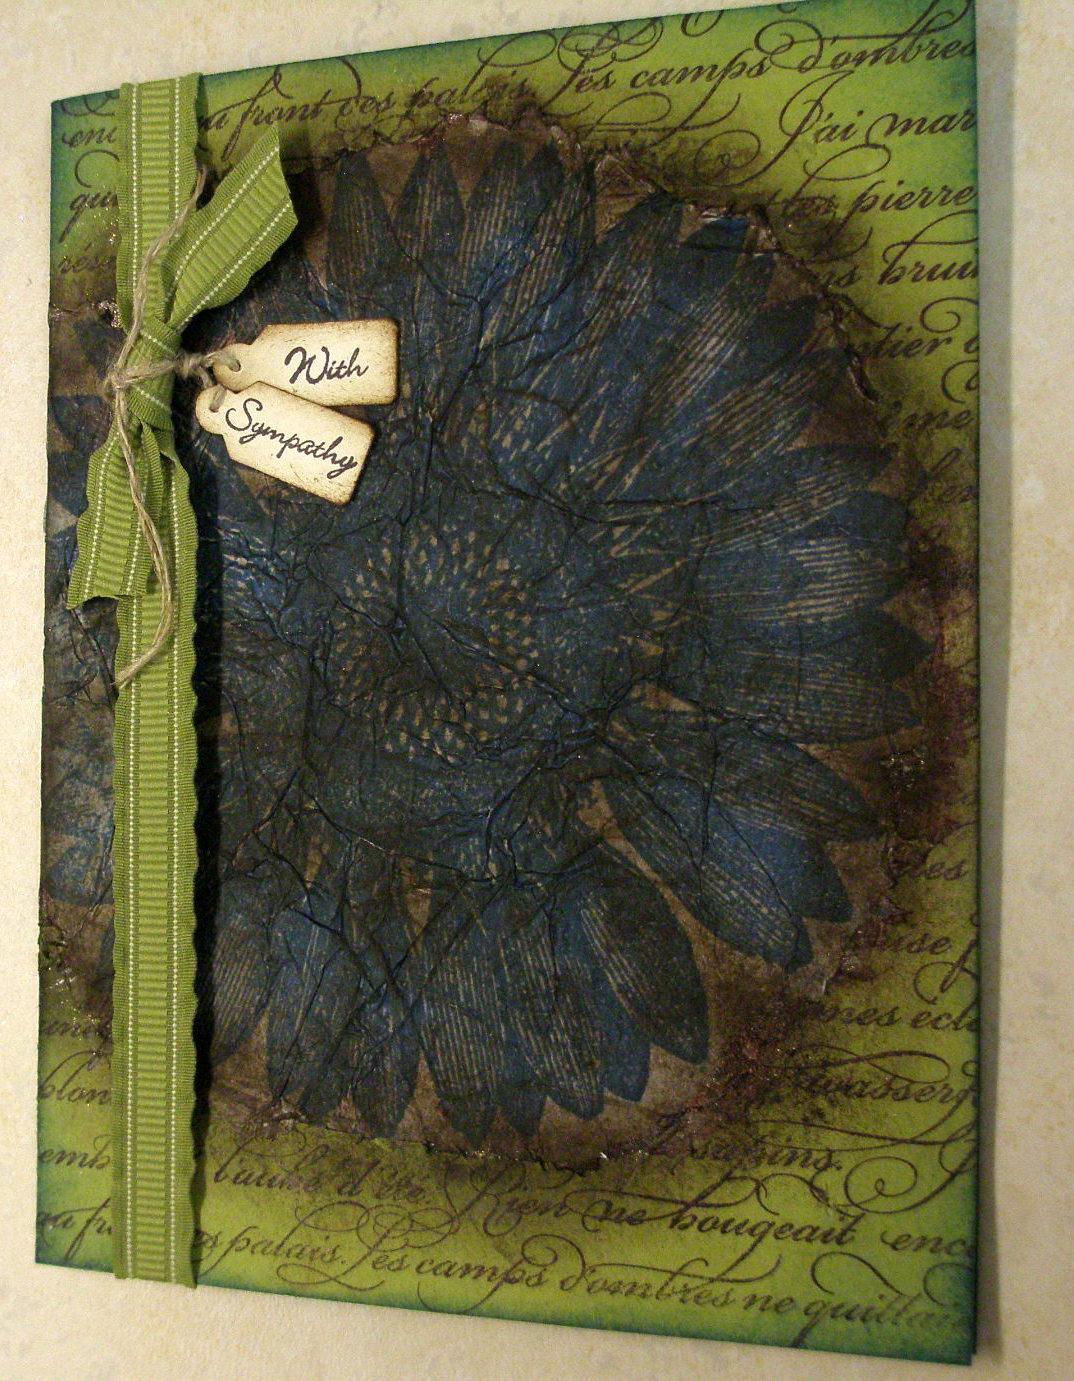
The Sunflower Background Stamp was paired with the En Francais Background Stamp.  The Sunflower was stamped on tissue paper in Not Quite Navy Classic Ink and sponged with Soft Suede Classic Ink.  Accessories:  Lucky Limeade Ruffled Ribbon, Linen Tread, Jewelry Tag Punch, and Anywhere Glue Stick.
 
I don't think you can get anything more simplier than this card -- it is literally a 1-minute card including cutting!  The Sunflower Background Stamp is stamped directly on Well Worn Designer Series Paper, in Cajun Craze Classic Ink and the sentiment (from Pursuit of Happiness Stamp Set) is stamped in Early Expresso Classic Ink.

I decided to do a bookmark for the Creative Convention Shoebox Swap as I had a lot of the plastic inserts left from a purchase I made a couple of years ago.  Supplies:  Always Grateful Stamp Set; Pizzazz and Confetti White Cardstock; Spice Cake Designer Series Pape; So Saffron, Marina Mist, and Wild Wasabi Markers; and Pear Pizzazz Classic Ink swipped direct to paper using blank rubber stamp. 
I hope you like!  Probably only two more posts and I will be done showing you my projects from Creative Convention presentation -- so bear with me.

Until next time,
Sandi
"Lo, I am with you always, even unto the end of the world."  -- Matthew 28:20
"Lord, thank You for the ways You reveal Yourself to me, even when I'm not paying attention." -- Gail Thorell Schilling

Monday, October 10, 2011

FALL WITH SPICE CAKE

I hope you aren't tired of seeing some more of my projects I made for the Creative Convention.  I told you I had a lot, and I still have enough to show for the rest of my posts this month.  Today I am featuring the Spice Cake Product Suite, along with another background stamp.  The weather and colors of this past week make it the perfect product to showcase.  I just can't get into showing Christmas samples until at least the month before Christmas or there is some snow on the ground.  I think too many of us skip over those beautiful Fall days with all the colors (can you tell it is my favorite time of the year).  I have had these projects done for almost two months, so I am totally excited that I can finally show them on my blog.

This circular box was CASEd from the Holiday Mini Catalog, page 19.  I have never made a circular box from scratch before so it was a challenge for me to do the math.  But got lucky on the first try!!  I used Wild Wasabi Card Stock for the base of the box, stamped with the new Parlor Prints Background Stamp in Not Quite Navy Classic Ink.  Accessories included:  Petite Pennants Builder Punch, 3/8" Twill Tape, On Board Merry Medley Chipboard, Antique Brads,  Brass Eyelets (oops, I thought these were still current), Always Thankful Stamp Set, and Paisley Petals Designer Series Paper.

And here are my fabric pumpkins and card box.  I got the pattern for the pumpkins from Martha Stewart'sWEB SITE (actually have had it for over a year, just didn't get done last year).  These were easy peasy to make.  I used the Spice Cake Designer Fabric, Chocolate Chip Baker's Twine to make the veins on the pumpkins, and some Pear Pizzazz 1/2" Stitched-Poly Ribbon.  See below for box supplies.

The box was made using Stampin' Up's new Stampin' Card Keeper.  I covered the entire box with First Edition Speciality Paper, then stamped the Sunflower Background Stamp on tissue paper with Not Quite Navy Classic Ink, ripped around the flower and adhered to the box with SU's Anywhere Glue Stick.  I then sponged around edges, etc. with Soft Suede Classic Ink.  A piece of the Spice Cake Frabic was tied around the lid and bottom of the box, then flowers made with the Sunflower Background Stamp Set (stamped on First Edition Speciality Paper and cut) were adhered.  There is a Spice Cake Designer Button in the middle of one of the flowers that you probably can't see until you click on the picture to enlarge.
I hope we squeeze in one more beautiful day before the rain starts, but either way enjoy your week!!

Blessings to all,
Sandi

"He will be our guide even unto death." -- Psalm 48:14
"Dear Father, may all our partings be filled with Your peace." -- Karen Barber

Sunday, October 2, 2011

CREATIVE CONVENTION!!!

Wow, what a fabulous four days I have had!!!  Most of you know by now that I have been preparing projects as a presenter for Ronda Wade's Creative Convention this last weekend.  Well, let me tell you, it was absolutely fabulous.  I learned so much, stamped for 4 days, and made some fabulous new friends as well as getting a chance to really sit down and visit with my old friends.  There were 80+ ladies there, from all over.  From the awesome Canadian ladies, to the large group from Tennessee, and demos in Ohio, Indiana, Illinois, Wisconsin, and my home state, Michigan, we had a great representation of demonstrators from all over.  If I left anybody out, please forgive me and remember that I am a senior citizen!!

So what does this mean to you?  It means you are going to see tons of projects in the next couple of weeks from some very talented stamping demonstrators.  Today is just a warm up -- so trust me, you better make sure you come back every couple of days to check out the rest.  Tons of new ideas for you to try out!!

Today I want to show you our "convention bags" we received as we checked in -- so cute and very durable -- thank you RONDA!!  And then some of the swap cards that were swapped on the night of our Social (when we were treated with a yum, yum chocolate fountain).

Yes, there were even SU product goodies in our bag.  Don't you just love how Ronda designed the bags with the name of her convention, with matching notepads and pens.  And of course, the added WOW was the monogrammed scalloped circle to identify who it belonged to as there were 80+ of these sitting all over the place!! 
 
This was my swap card -- the theme was "Anything With a Stocking."  My layout was somewhat CASEd from Debra Currier, just different colors, technique, etc.  I used the reverse masking technique to make a shim before using the Snow Burst Embossing Folder and then brayed over the top with Whisper White Craft Ink.  Card stock:  Old Olive, Marina Mist, Whisper White, Riding Hood Red, and Letters to Santa Designer Series Paper.  Accessories:  Mini Jingle Bells, Baker's Twine, Rhinestones, and Stocking Builder Punch.

I had to show you this card done by Sheryl Spitzley, from Portland, Michigan -- isn't it gorgeous!!!  You know I love anything vintage!! 

And the winner of the "Anything With a Stocking Swap":  Melissa Davies, of Michigan.  Isn't this just the cutest design you have ever seen!!  The details of this card can be found on her website, at  www.rubberfunatics.blogspot.com
Well, I've had my shower and put on my "Advanced Nighttime Repair Serum" so I guess I am going to try again to see if it works and hit the sheets (it never has worked in the past -- I still wake up every morning looking old, but I'm hoping one day to be surprised).  Please make sure you stop back to see my projects I made for my inspiration table -- a lot of new stuff and techniques!!  I promise there will be something for everybody (especially when I also have over 100 new cards)!!

Thank you for stopping by,
Sandi
"Even in old age they will still produce fruit and be vital and green." -- Psalm 92:14
"Heavenly Father, thank You for the adventures that lie ahead." --  Patricia Lorenz