Thursday, March 22, 2012

VACATION: DAY 7

Well here it is Day 8 already and it seems like we have packed a month-long vacation into one week.  We have done and seen so much that I cannot begin to capture it in my blog updates.  Yesterday we went up Mingus Mountain to Jerome City (where I could spend the rest of my life) and in the afternoon we went to Montezuma National Forest to see the cliff dwellings at Montezuma Castle.  The beauty of the trees and flora were amazing.  Teddy Roosevelt named this a national monument (I think it was either the 4th or 5th) and I can see why. 

Today we went through Sedona as we decided we would go to the Grand Canyon, and we "almost" made it until my brother stopped by the side of the road to get some pictures and my baby sister, Pam (who is never afraid to do anything), had a panic attack and said (or should I say screamed) she couldn't take the heights any longer.  Of course it didn't help that my brother pulled over on this tiny piece of roadside that was a shear drop-off from on top of the mountain (about 7,000 feet up).  So after calming her down, we turned around and went back to Sedona for the day (woohoo, my lucky day!!).  I didn't take my camera so you have been saved from looking at more of these pictures -- but Sedona is totally "a must see" city for everybody.

Here are some pictures from yesterday:

This has nothing to do with the scenery, but it was in a shop, in Jerome City, and I loved how they made it.  The picture doesn't do it justice, however it is good enough for me to CASE as it is made out of paper.  Look for my interpretation in an upcoming blog!!

Looking down the valley from Jerome City, on Mingus Mountain.


Walking up to the Castle.

Where the Sinagua Farmers lived in A.D. 1100.

This castle housed about 35 people and another (Castle "A") housed close to 175 people, for a total of over 200 in the community.  Three ladders were used to get between the 5 levels of this Castle.

The walk up to the Castle was beautiful, with these large Sycamore trees all over (some of them were much, much larger).

Ruins from Castle "A"
I too over 50 pictures this day, and they are all beautiful; however, I didn't want to bore you with more pictures.  Needless to say I am having a great time but missing my home and family very much.  We are on our way to Vegas tomorrow so probably won't have time to take pictures and/or post. 

Until next time,
Sandi
"In every thing give thanks: for this is the will of God in Christ Jesus concerning you." -- 1 Thessalonians 5:18

Sunday, March 18, 2012

STAMPIN' UP ELEGANT BIRD BIGZ DIE & VACATION

Thought I would do some computer work today as we cannot go outside.  We have 55 mile per hour winds right now, and the roads are closed because of the sand storm.  I am so glad I decided to do my laundry to hang outside yesterday (my poor sister's are doing theirs today and have to hang inside!!).  It is so relaxing to just have "NOTHING" to do!!  So today I am showing you a couple more of my cards made for SAB Event (yep, still have more) and more pictures of vacation. 

A simple card featuring a lot of product from the Stampin' Up Occasions Mini Catalog:  Elegant Bird Bigz Die, Attic Boutique Designer Series Paper, Large and Small Pearls, Pool Party Ruffled Ribbon, Paper Doily Large Sizzlits Die, Large Straight Pin, and Island Pacific Ruffled Ribbon (also 2 embossing folders but can't remember names as I don't have my catalogs with me -- sorry). 

Another card using the same product and White Baker's Twine (added a little tulle with the ribbon on the straight pin).

The following pictures were all taken at a roadside park on the way down to Columbus, New Mexico (from Tucson, Arizona).

This is my brother who is a prospector (dah, I bet you guessed already huh???) and antique dealer.  Now you know where I get it from (and I'm not going to say what that is, I will leave it to your imagination).

My sister Kathleen walking around.  This is the view we had pretty much the whole way down to New Mexico.

Last one -- just a close-up.
You probably won't be hearing from me for a while, as we are leaving early Tuesday to drive up to Cottonwood, Arizona (near Sedona and Jerome).  I surely hope the wind stops blowing so hard, or we may have a pretty rough time driving.

Until next time,
Sandi

“Then Peter came up and said to him, “Lord, how often will my brother sin against me, and I forgive him? As many as seven times?” Jesus said to him, “I do not say to you seven times, but seventy times seven.”  --  Matthew 18:21-22

Friday, March 16, 2012

VACATION: DAY 2 and STAMPIN' UP RUE DES FLEURS

Another beautiful 2 days on vacation!!  I am so not used to having all this sun and tempatures in the 80s, but loving every minute.  This evening I am in New Mexico, less than a mile from the Mexico border (looking at the border wall all aglow with lights right now).  We drove down from Tucson to my brothers house today and saw some gorgeous scenary on the way here.  I'll post a couple of pictures in my next update, because today I want to show you some more pictures of Kartchner Caverns State Park.  We were very lucky, because 3 people did not show up, to get tickets to tour the Caverns yesterday morning as it was booked solid until the 19th.  We had the most awesome tour guide, who gave us background information on how the caverns were created millions of years ago, how they were found, and so much more.  I am always so totally amazed at how many beautiful places there are to see right here in the USA -- one does not need a lot of money or go to another country to see God's creations!

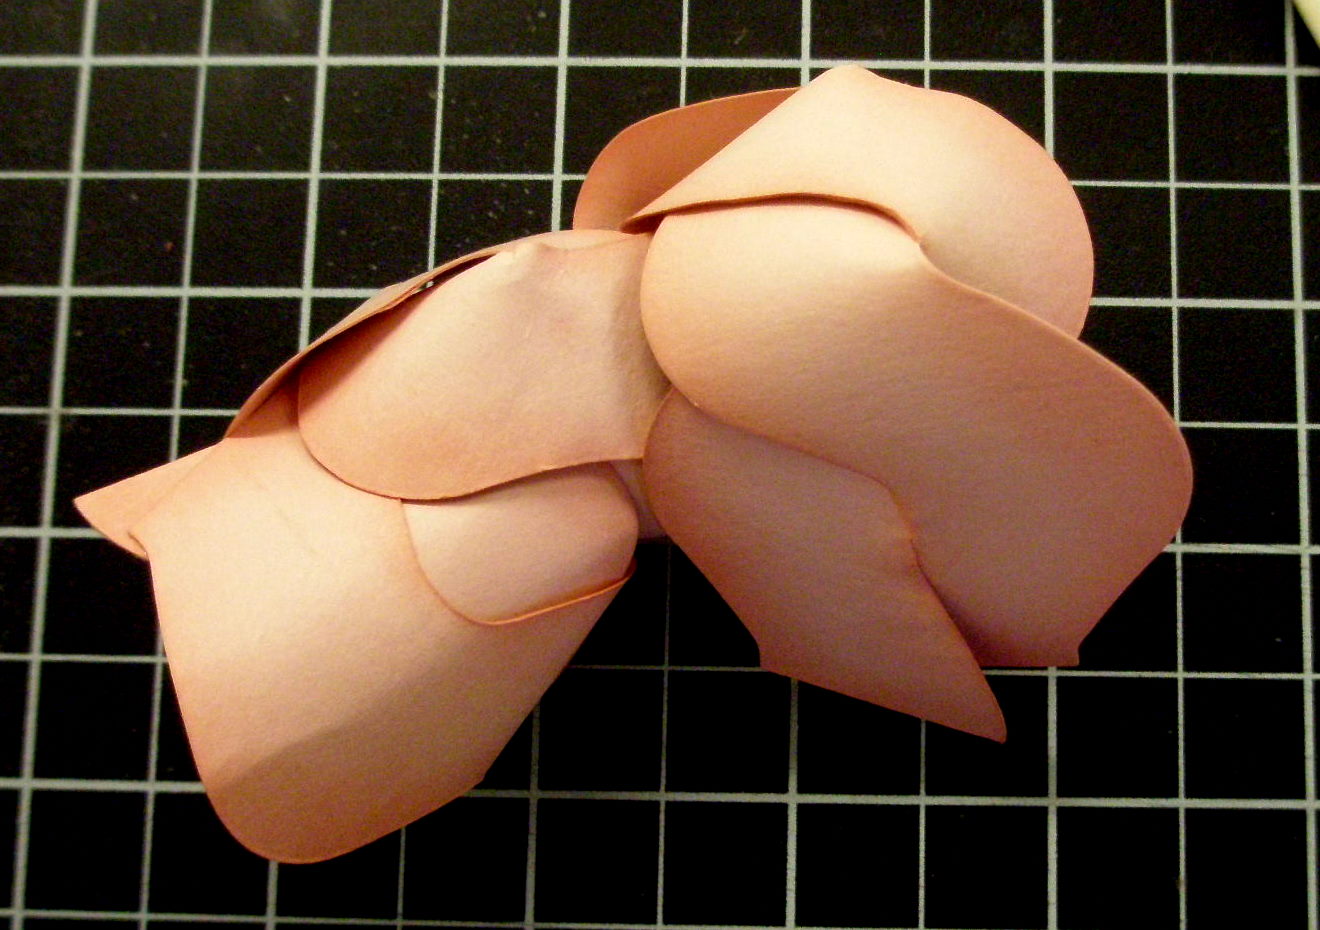
Before the trip pictures, I actually do have a card to show you, using the new Rue Des Fleurs Stamp Set in the Occasions Mini Catalog.  I can't give you a list of all the Stampin' Up product used because I forgot to pack my catalogs -- sorry, but it is vacation time for me.

I made one like this at my last card class, but switched it up a little.  I love this card with the lacy Adorning Accents Edgelits Die and Vintage Embossing Folder.  I think this is such a beautiful wedding card.
A little bit of history, well worth reading so you have the background of the discovery of the caverns.

Shasta Ground Sloth -- bones found in caverns.  See below for story.


Inside one of the rooms in the Cavern.  The Rotunda Throne tour takes 1.3 hour and the Big Room takes 1.5. The Rotunda Tour explains the basic science of the cave and how limestone caves form. The Big Room's tour theme is Discovery: Past, Present, and Future. Tour guides also cover cave science and cave bats.

Later in the day we took a tour of the gardens around the Kartchner Caverns Visitor Center.  This is the Smooth Edge Agave Cactus.

The Butterfly Garden and a portion of the Center showing in upper left.  I never knew there was so many different varieties of Cacti.
It is so hard to show you in these few pictures how beautiful it is in person.  Plus, I was very disappointed that we were not allowed to take pictures inside of the cavern (the story behind that is way too long to put on a post, but very interesting as to why we couldn't). 

So now this girl is hitting the sheets as it was after 2 a.m. last night before I got to bed, and almost 2 a.m. now -- I need sleep!!

Until next time,
Sandi

Tuesday, March 13, 2012

VACATION: DAY 1

Just a real quick post today -- the weather and company is too awesome for me to be on my computer!!  I am sitting here in shorts at 8:45 p.m.!!  Absolutely gorgeous day in Tucson -- probably close to 80 degrees.  We flew in at 10 a.m. (been up since 2:30 a.m. this morning), and my brother picked us up at the Tucson airport in his motor home.  We are spending a couple of days in Bensen, Arizona (about 30 miles from Tucson), at the Kartchner Caverns State Park.  We did a little hiking today, but saving our strength for some long-distance hiking trails and the caverns tomorrow.  Of course, we don't know yet if there are any tickets available for tomorrow.  Today was sold out. 

Here is a picture of the view in front of our campsite (actually these mountains surround us).  I should have waited to get the sunset, but not sure if I will stay awake that long!!

Not a great picture, but this surrounds the whole campground.

My sister Pam, on the airplane.

From Right to Left:  My sister Kathy, brother Richard, and sister Pam at our camp sight.

Just before take-off this morning from Detroit, Michigan.  My sisters are not real happy because neither one likes to fly (Kathy has never flown before, but loved it after about 10 minutes in the air).
That's all for today.  I'll be checking back in soon.

Sunday, March 11, 2012

STAMPIN' UP: ATTIC BOUTIQUE SUITE - #4

Do you feel like you are an hour behind on your schedule today?  Well I do.  I really don't like this time change, but then I don't suppose most people do.  The only bright spot (and I always try to find one), is the fact we are getting closer to Spring.  I have been working furiously trying to get everything done that I want to do before I leave in 2 days for my trip.  I hate to leave my husband or house without getting all those irritating chores done that I have been putting off the last six months.  You know, cleaning out the refrigerator, filing all the bills and discarding tons of junk I found out I didn't need to save, cleaning bathrooms, closets, drawers, laundry -- you get the picture!  Notice I didn't mention dusting -- that's because he does a better job dusting than I do -- LOL!!

Today I have a few more pictures of items I made for the Spring Sale-A-Bration event (yep, and I still have more).  I will post a few more while I am on vacation and hopefully a few pictures of places we see when in Arizona, Nevada, and New Mexico.  I am getting so excited!!  Until then, hope these pictures will give you some inspiration to create projects using the new Rue Des Fleurs Stamp Set and the rest of the Stampin' Up product featured in the Attic Boutique Suite of the Occasions Mini Catalog.

Product used for 2-page 12" x 12" album:  Attic Boutique Designer Series Paper; Rue Des Fleurs Stamp Set; Attic Boutique Side Notes; Dresden Designs Bigz Die; Designer Rosette Bigz XL Die; Big Shot; Everyday Enchantment Brad (SAB Mini); Distressing Essentials Tea Stain; Twine and Early Espresso/White Baker's Twine; and  Soft Suede and Poppy Parade Card Stock.

Close-up of left page.  The umbrella (top-right corner) uses Designer Rosette Bigz XL Die on top of the stamped image.

Close-up of right page, using the Dresden Designs Bigz L Die and then embroidered border using the Baker's Twine.

Another close-up of right-page showing the tag hidden beneath the picture that slides out (ran out of room for my tags).

Just a fun project perfect for that little girl having a birthday party.  I think it would be nice to hang name tags around the neck for the tea party!!   Product used:  Styrofoam Cone and Ball; Attic Boutique Designer Series Paper; Designer Rosette Bigz XL Die; Elegant Bird Bigz Die; Paper Doily Large Sizzlits Die; Scallop Circle #2 Bigz Die; Pool Party Seam Binding; Large Pearl Basic Jewels; Dazzling Details; Wire; White Waffle Paper; Mica Flakes; and Boho Blossoms Punch.  I also have an empty brad container glued under the skirt so the ruffles wouldn't sit on top of the scallop circle.
Until next time,
Sandi
"Don't copy the behavior and customs of this world, but let God transform you into a new person by changing the way you think. . . ."  --  Romans 12:2

Monday, March 5, 2012

STAMPIN' UP: TASTEFUL TRIM ROSES

Wow, did you think I had forgotten to provide a tutorial on how I made my roses? Actually, I have been very busy trying to get a ton of work done before going out west with two of my sisters to meet up with two of my brothers and travel around New Mexico, Arizona, and Nevada.  I finally just got around to opening my box of Stampin' Up product that included a replacement of my Blushing Bride Smooch Spritz that I dropped and broke when I was making these for my presentation.  Actually I love it so much that I got 2 bottles!!!  (Who knows if it will be discontinued on May 1st?).

Before the tutorial, I want to thank Lynn Pratt, www.stampndesign.blogspot.com, for sharing her tutorial on her blog (post dated:  January 22, 2012).  I did mine a little different, so I created instructions based on how I made my roses.  Please check her blog for her down loadable directions (and comment your thanks), as you can look at both to decide how you want to make your roses. So here we go folks (please remember, you can right-click on the pictures to open in another tab/window a larger picture):

Picture from Previous Post of my roses done for SAB Event


Tutorial:  Card Stock Roses Using Stampin’ Up Tasteful Trim Bigz XL Big Shot Die -- By Sandi Dailey

Product Used
Cardstock:
12" x 12" Blushing Bride and Always Artichoke Scraps
Ink:
Blushing Bride Classic Ink
Punches:
5-Petal Flower and Blossom Petals Builder Punches
Big Shot:
Tasteful Trim Bigz XL Die
Accessories:
Blushing Bride Smooch Spritz; Tombow Liquid Glue; Simply Scoring Stylus; Mat Pack; Sponge; wooden skewer (think Shish-Kabob); Water Misting Bottle; Bone Folder; Paper Piercer or 1/8" hole punch

Directions (To print A PDF click on the "print" button below):

  1. Cut two 2" x 12" strips of Blushing Bride Card Stock.
  2. Run strips through the Big Shot using the Tasteful Trim Bigz XL Die (curvy design).
3.  Sponge edges of die cut card stock with Blushing Bride Classic Ink on sponge.

4.  Run your Bone Folder across the die cuts a couple of times to break down fibers (it will curl). 
5. Put the two die cuts on top of each other, as shown, and apply a little Tombow to glue the top edge together. 
6.  Let it dry, then start braiding by crossing them over each other (instead of 3 strands, you will only have 2 strands to braid).The card stock will curl as you braid.

7.  After it is all braided, start winding/rolling it up. I started with a tight roll at first, and then loosened a bit to give it the look of a rose not fully bloomed. You can roll it as loose or tight as you want your rose to look like.
8.  When you get to the end, glue the strips together, trim the end edges, and glue end to body of rose with Tombow.   It will NOT look pretty folks, but should resemble a rose bud a little – you are not done yet, so don’t give up!!   I used my Simply Scored Stylus to put under the petals to shape it better.
9.  Mist with water and curl the edges of the petals – mess with it until you get the look you want.  Don’t worry if it rips a little, stuff happens, but it will still look good. Let it dry, or use Heat Tool to dry if you are in a hurry (like I am).
  10.   Mist with Blushing Bride Smooch Spritz (I like a real good coat of the smooch on mine). NOTE: I forgot to apply my Smooch Spritz, so did it at the end and wiped away smooch on leaves (boo boos are fixable).

11.  Punch 5 leaves using the Blossom Builder Punch and one flower from the 5-Petal Flower Punch in Always Artichoke Card Stock.

12.  Using Tombow Glue, attach the leaves to the 5-Petal Flower (see picture).       

13.  Punch a hole in the middle.  Tip: I misted mine with water and shaped it a little before gluing to the rose (see picture).

14.  Glue leaves to the bottom of your rose – don’t put glue on the upper-top of the leaves so you can curl these down a little – center the punched hole over the hole on the bottom of your rose.  This is how it looks after attaching leaves (but yours should have Blushing Bride Smooch Spritz on it).

15.  Use some ¼" strips Always Artichoke Card Stock to wrap around your skewer. It works much better if you break down the fibers of the card stock with your bone folder first (it will curl).


16.  You can either apply Tombow Glue to the skewer or the card stock to adhere.  TIP:  Keep a wet rag next to you so you can clean your fingers from runoff glue.

17.  Punch 3 of the big blossoms from the Blossom Petals Builder Punch in Always Artichoke Card Stock and trim the top edges (see picture).


18.  Use the Simply Scoring Stylus with the Paper Piercing Mat (from the Mat Pack) to emboss some veins on your leaves.

19.  Attach the leaves to the rose stem using Tombow Glue.  (Finally got that smooch on mine!!)

And here is my bouquet of roses!!  Notice they are all different sizes (i.e., stages of bloom), based on how tight I rolled my petal strips.

I hope you like these half as much as I do!!  They make such a beautiful centerpiece on my bar.  The instructions are long; but trust me, the rose takes about 5 minutes to make and wrapping the wooden skewer takes a little longer.  I can't wait to see samples of your roses -- please share!!

Until next time,
Sandi
"For we walk by faith, not by sight."  --  II Corinthians 5:7
"Lord, give me the courage to walk out in faith to answer your call."  -- Dolphus Weary