Sunday, September 23, 2012

STAMPIN' UP MIXED MEDIA CANVAS

I have a lot to show you today, so I am going to jump right into this update.  First, a couple of pictures of more Fall projects.  I also had quite a few requests for directions on how I made my table setting (see prior post), so at the end I have provided the measurements and short directions on how to put this together (very, very easy). 

At Stampin' Up 2012 Convention I attended a class where we decorated this canvas with designer paper.  After getting home, I decided I didn't like the style at all so I ripped everything off and started completely over to design a mixed media canvas.  The base of the canvas was first painted with blue acrylic paint (at convention), so I kept this the same.  This is what I came up with.  I used a lot of stamps, designer paper, card stock, sponging, and a Precision File (from SU's discontinued Distressing Essentials Kit) to file off the designer paper to make the clouds.

Sorry about the color quality of  this card (too lazy to retake picture).  The pumpkins actually have more color in real life.  Product used:  Full of Blessings Stamp Set, Watercolor Wonder Crayons, Apothecary Framelits. Essentials Paper-Piercing Pack, Naturals Ivory Card Stock, Cherry Cobbler Coor'dinations Card Stock, Vintage Wallpaper Embossing Folder, and (Gold) Basics Glimmer Brads.
 Now for some directions on making the table setting holder:


1.    Start with 8" x 11" piece of card stock (use color to match your designer series paper). 
2.    Lay card stock on Simply Scored tool so that 8" width is at top and score at ½", 1", 1 ½",
 6 ½", 7", and 7 ½". 
3.    Turn card stock 90 degrees so that 11" width is at top and score at 4 ¼" and 8 1/2".  
4.    See picture of finished, scored card stock above, and cut away the areas darkened.
 
5.  This is what it should look like after cutting and creasing the score lines.

6.  Turn it over so you can apply Sticky Tape, as shown above.

7.  Turn it back over and fold up to adhere sides and decorate as you wish.

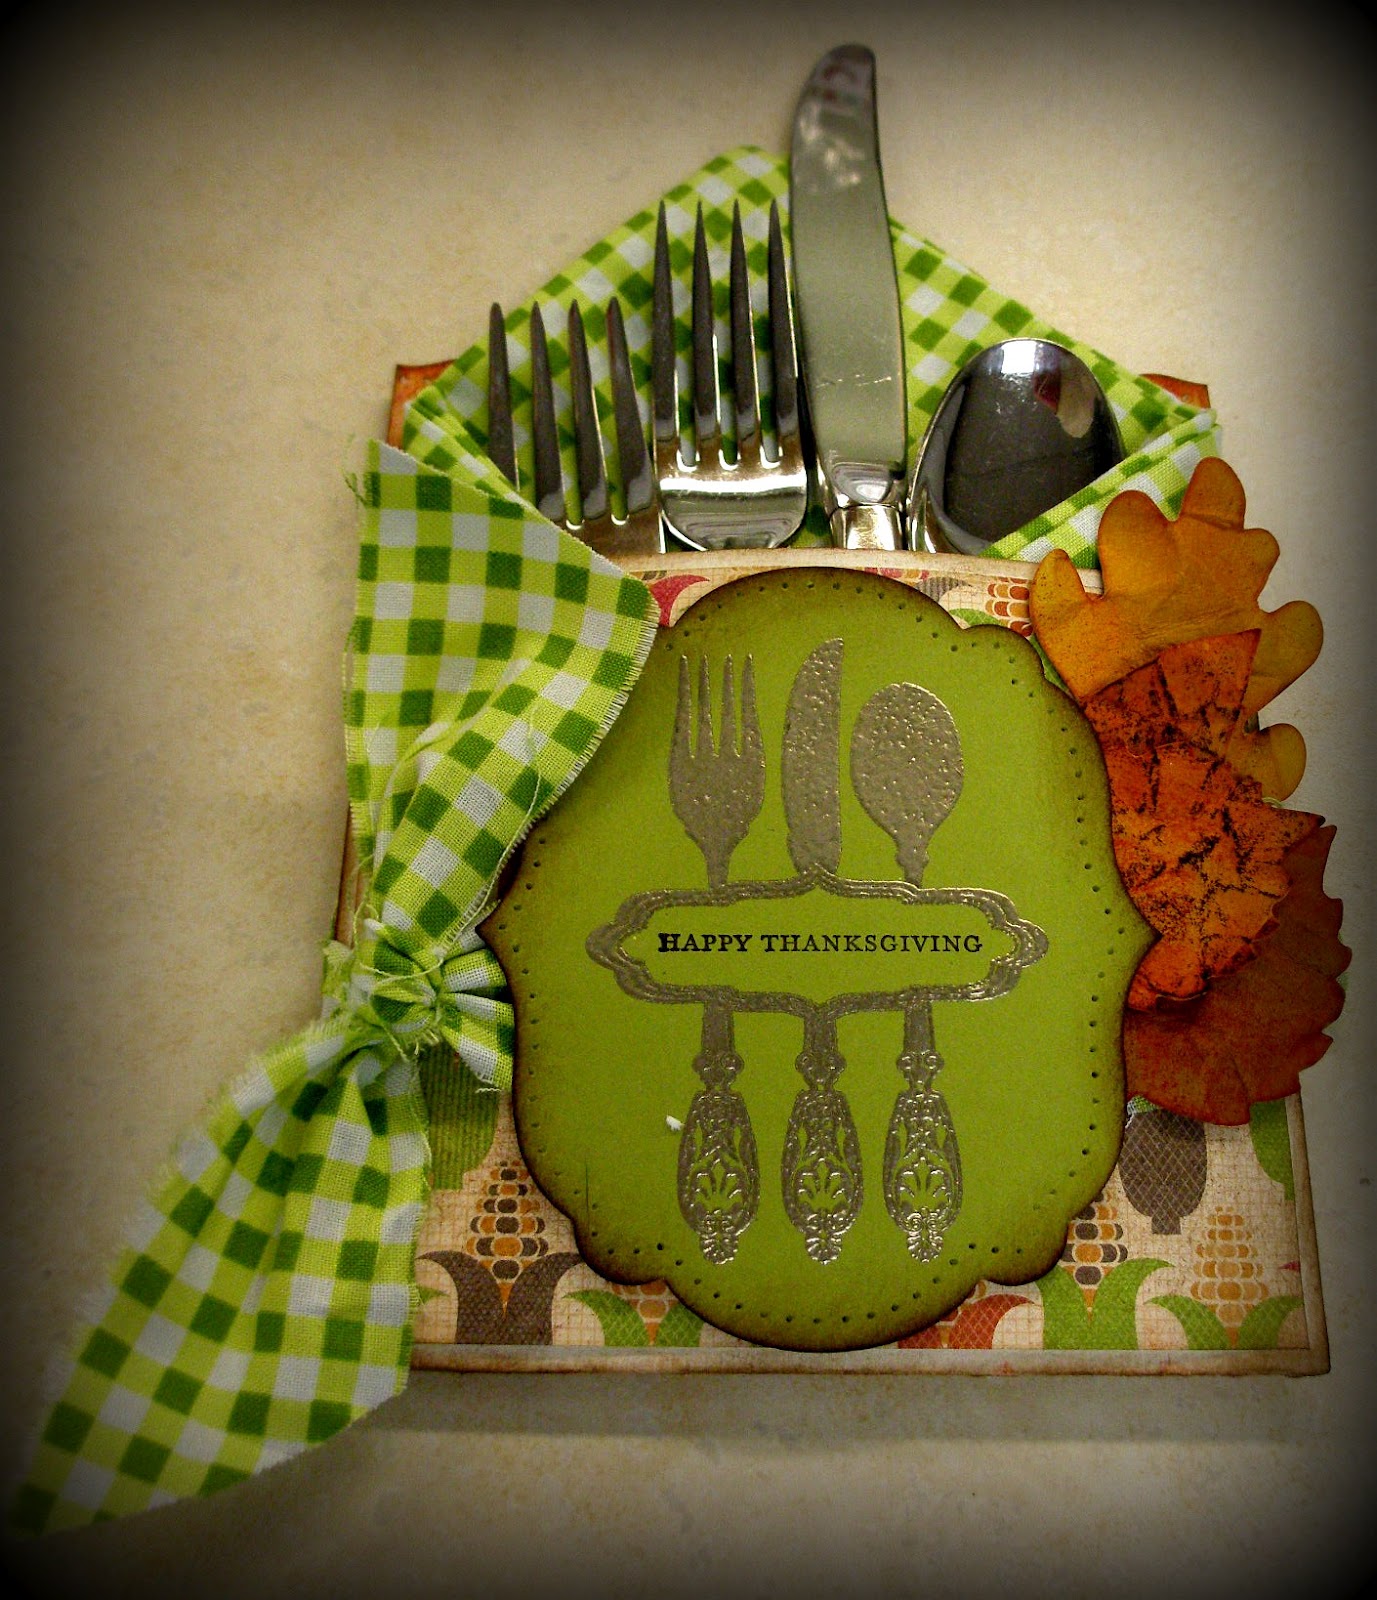
This is how I decorated mine, but I can envision so many different designs for whatever theme you want (Christmas themes would be awesome!!).
Let me know if you have any questions on these directions.  Please note that you can save these directions as a PDF if you click on the "Print in PDF" button below.  Just follow the directions on the dialog boxes when they pop up (you have the option of deleting text you don't want to include).

Until next time,
Sandi

"God is our refuge and strength, a very present help in trouble."  -- Psalm 46:1
Thank you, Father, for giving me the friends I need when I need them.

Saturday, September 15, 2012

I AM FALL!!


Don't you just love Michigan's Fall season!!  I really wish it would stay this way all year long.  I don't think I would ever get bored with just this one season -- preferably, just the month of September!  It has been a really laid-back week for me, and I'm loven' every bit of it!!  I can't even think of one outrages thing that I have done, which is probably a first for me to go a whole week without something goofy happening.  I probably shouldn't even admit to this because technically I still have one day left for the week. 

Today's post will be more pictures from my presentation, "I AM FALL," at Ronda Wade's Creative Convention.  See my previous post for more information on my presentation.  The picture at the top of this post was used for my table banner at the Convention (all of the presenters created banners to identify what they were doing for their presentation).

I created this table setting (excuse the piece of lint on this picture, just noticed) based on the measurements of the "Season of Sweets Designer Kit," on page 15, of the Stampin' Up! Holiday Catalog.  I needed a pocket with depth to hold the napkin and tableware -- so this was perfect!!  Product included:  Orchard Harvest Designer Fabric and Designer Paper, Silver Setting  and Teeny Tiny Wishes Stamp Sets, Pewter Embossing Powder, Framelits Labels Collection, Festive Paper-Piercing Pack, Early Espresso Classic Ink, and Crumb Cake Card Stock.  (Of course the leaf embellishments are another story to come.)

To go with my table setting is a party favor box with note cards inside.  Besides the above product, I used:  Kraft Gift Box, Designer Naturals Buttons, Jumbo Sticky Rounds, and Island Indigo Card Stock.

Here is a close-up picture of the flower on top of my box and leaves.

Okay, this is my goofy thing I did at Convention -- I forgot to take the note cards out of the box for my display!!  So hopefully some of  attendees will come to my blog to see them -- LOL!!  I love designing these boxes so had to make two of them for my table.  Once you make one, you just can't stop, plus I use these little note cards a lot for gifts.  I used the same Stampin' Up! product as above for the card box, just different design.  Product used for the note cards:  Very Vanilla Card Stock; Stampin' Spritzer (with Early Espresso Classic Ink); French Foliage Stamp Set; and for the sentiments:  Lacy and Lovely, Petite Pairs, Just Believe, and Elements of Style Stamp Sets. 
Okay, that about does it for me today.  I hope I don't bore you with all of my Fall projects that I will be sharing this month.

Until next time,
Sandi

"Bear with each other and forgive whatever grievances you may have against one another.  Forgive as the Lord forgave you."  -- Colossians 3:13

"No wonder You tell us to forgive a brother not seven times, Lord, but twenty-seven times, because You know how hard it is."  -- Carol Kuykendall

Monday, September 10, 2012

WONDERFALL FALL!!

No, technically I did not drop off the face of earth, but physically I did!!  I know it has been a month since I last posted, but I hope you all come back to visit me and leave a comment to let me know how you are doing.  It truly has been a whirlwind the last 30 days (I think I packed 6 months into it).  So many big parties and lots of family fun, but I'm so glad it is over.  Will I do it again, hmmmm -- probably so.

I left last Thursday to attend and present at Ronda Wade's Creative Convention that ended on Sunday.  All I can say is:  WOW, WOW, WOW!!!  This is the 2nd time she has had this event, and let me tell you, you would have thought she had been doing this for years.  My brain is bursting with creativity and business tips/ideas!!  And so much fun visiting and laughing with fellow demonstrators from Canada, Kentucky, New York, Illinois, Ohio, Michigan and probably many more states.  So guess what projects you will be seeing for at least the next month?????  Yep, pictures and some directions from my presentation.  Ronda asked that I prepare Fall-themed projects; concentrating on the Wonderfall Stamp Set, Autumn Accents Bigz Die, and Orchard Harvest Designer Fabric.  And of course, I threw in some other stamps and accessories from the new Stampin' Up Holiday Mini.  So here are a couple of pictures:

First, I have to thank Ronda's daughter Erica for giving me one of her Barbie dolls and a huge thank you to my sister Pam for doing the actual sewing (I only designed it, she did the hard work).  This was made using the fabulous Orchard Harvest Designer Fabric, Victoria Crochet Trim, and Island Indigo 3/8" Ruffled Ribbon.  I made the basket with Island Indigo Card Stock and Ruffled Ribbon and matching Designer Printed Brads.  (I will post directions on how I made the basket in a future post).

Here is a side picture of dress and basket.  I have to tell you, even though the product I was assigned did not allude to "vintage" projects -- I still had to squeeze in the Victorian Era doll because you know how much I love vintage!!  And of course, let me not forget all those leaves made with the fabulous new Autumn Accents Bigz Die (learned some tricks on making these).

Card features the Wonderfall Stamp Set.  I used the reverse masking technique, with Stampin' Up's Watercolor Wonder Crayons.

I left the Convention early so I could attend my granddaughter's baby shower, which I was co-hosting with my daughter (yep, I'm going to be a great-grandma!!).  So before I leave, I want to show you a couple pictures of projects I did for her shower:

Of course I used some Stampin' Up product for this cute table centerpiece:  retired ribbon and Dazzling Details on the edges of the flower petals (yes, it is hard to see in this picture but looked gorgeous in real life or if you enlarge the picture by right-clicking on the picture and select open in new tab/window).  These flowers were made out of plastic spoons!!!

A close-up showing the Dazzling Details better.

A simple thank you note card for the table favors (sorry, forgot to take picture of inside).
Thank you for stopping by, and come back soon as I have a lot of projects yet to show.

Until next time,

Sandi
"Ye are the light of the world. . . ."  --  Matthew 5:14
"Father, let my attitude light the way for happy times -- anywhere You choose to send me.  -- Pam Kidd"