I have a lot to show you today, so I am going to jump right into this update. First, a couple of pictures of more Fall projects. I also had quite a few requests for directions on how I made my table setting (see prior post), so at the end I have provided the measurements and short directions on how to put this together (very, very easy).
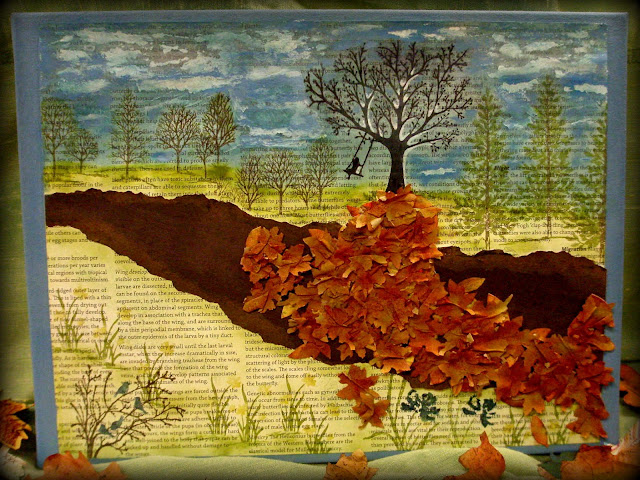 |
| At Stampin' Up 2012 Convention I attended a class where we decorated this canvas with designer paper. After getting home, I decided I didn't like the style at all so I ripped everything off and started completely over to design a mixed media canvas. The base of the canvas was first painted with blue acrylic paint (at convention), so I kept this the same. This is what I came up with. I used a lot of stamps, designer paper, card stock, sponging, and a Precision File (from SU's discontinued Distressing Essentials Kit) to file off the designer paper to make the clouds. |
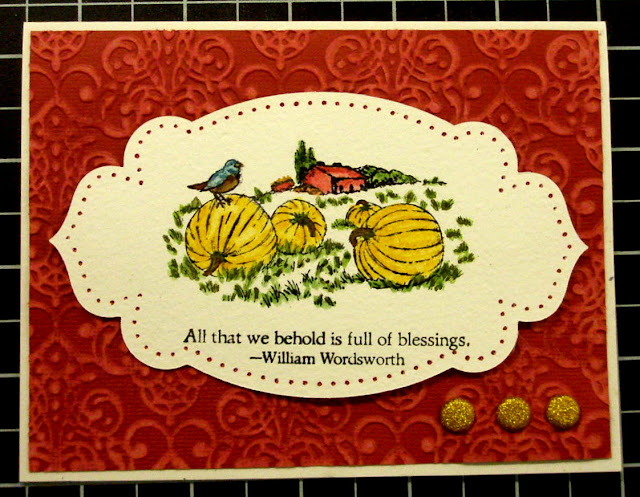 |
| Sorry about the color quality of this card (too lazy to retake picture). The pumpkins actually have more color in real life. Product used: Full of Blessings Stamp Set, Watercolor Wonder Crayons, Apothecary Framelits. Essentials Paper-Piercing Pack, Naturals Ivory Card Stock, Cherry Cobbler Coor'dinations Card Stock, Vintage Wallpaper Embossing Folder, and (Gold) Basics Glimmer Brads. |
Now for some directions on making the table setting holder:
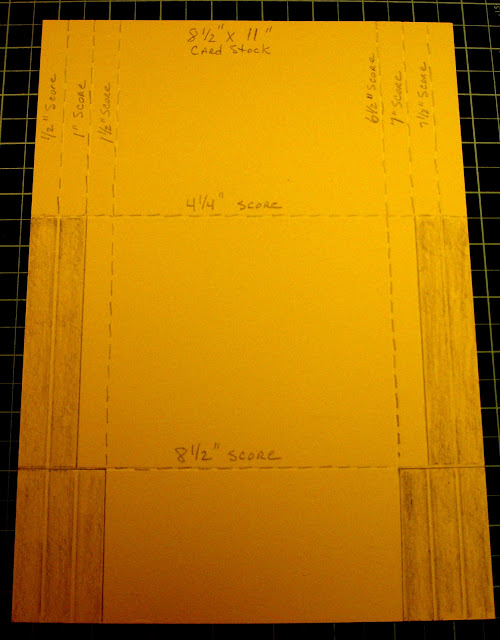 |
1. Start with 8" x 11" piece of card stock (use color to match your designer series paper).
2. Lay card stock on Simply Scored tool so that 8" width is at top and score at ½", 1", 1 ½",
6 ½", 7", and 7 ½".
3. Turn card stock 90 degrees so that 11" width is at top and score at 4 ¼" and 8 1/2".
4.
See picture of finished, scored card stock above, and
cut away the areas darkened.
|
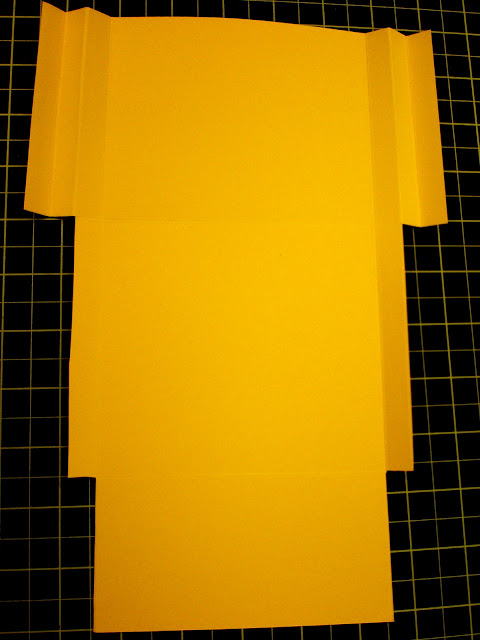 |
5. This is what it should look like after cutting and creasing the score lines.
|
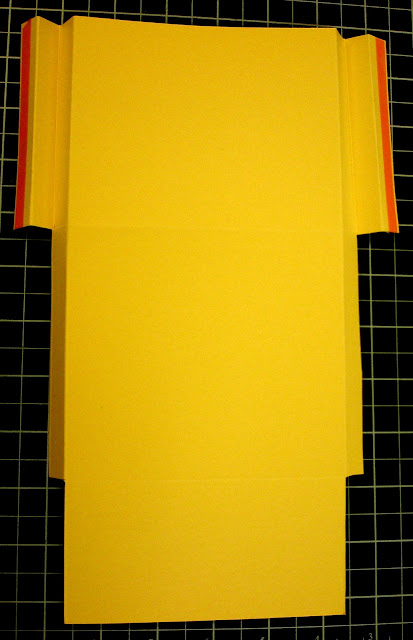 |
6. Turn it over so you can apply Sticky Tape, as shown above.
|
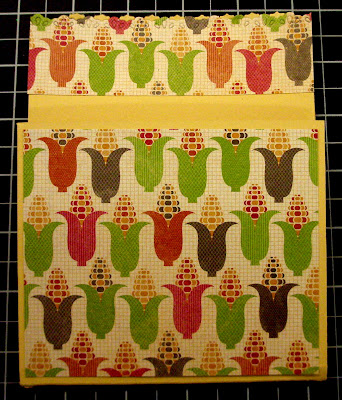 |
7. Turn it back over and fold up to adhere sides and decorate as you wish.
|
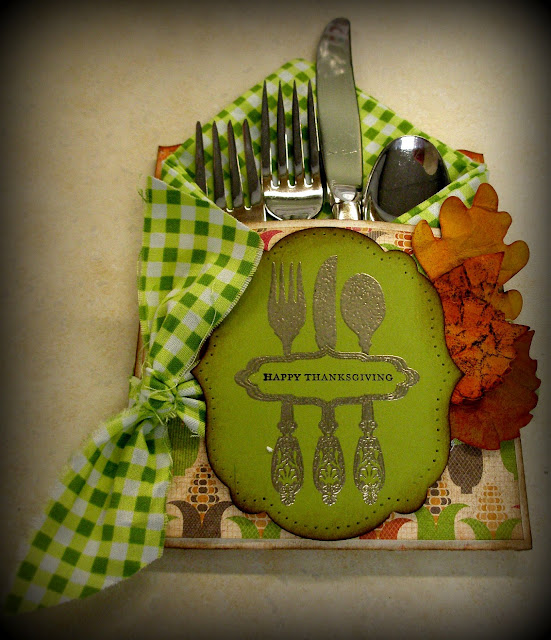 |
| This is how I decorated mine, but I can envision so many different designs for whatever theme you want (Christmas themes would be awesome!!). |
Let me know if you have any questions on these directions. Please note that you can save these directions as a PDF if you click on the "Print in PDF" button below. Just follow the directions on the dialog boxes when they pop up (you have the option of deleting text you don't want to include).
Until next time,
Sandi
"God is our refuge and strength, a very present help in trouble." -- Psalm 46:1
Thank you, Father, for giving me the friends I need when I need them.


Love the canvas! What a great idea. The leaves are so sweet and I like all the text poking through behind the sponging and paint.
ReplyDeleteHi Sandi!
ReplyDeleteI have an offer for you! I LOVE this design!! I don't have the 'fixins' for it. Would you be interested in doing a video for my Technique site? IF you decide that you would like to get some free time for doing the video please let me know!
A little about my technique site: It's called Twosday's Techniques: twosdaystechniques.com I have TWO Video Techniques EVERY Tuesday! I have over 200 on there now, and you can earn TWO free months AND you and your friends will be eligible to get on the site for the 6 month price, but stay for a year + 2 months if you do the video!!
This project you did is soooooo dang cute!! I would love to have That table setting added on my site! I just can't buy the set, I just spent $300.00 on things that I need for the site......So I'm begging you!!!
Let me know if you are interested!
Thanks
Lisa Tedder
I love all the projects and what a cute place setting. But most of all, I love the mixed media canvas. I have been wanting to do one and now I may just try it out. A definite WOW!
ReplyDeleteOkay I am going to try this again (Hope I can remember what I said!) I love the Canvas you upgraded. Those leaves really make it. Thanks for the tutorial for making the silverware holder. Super cute.TFS
ReplyDeleteThese are beautiful, Sandi! I love the canvas, card, and table setting holder. Thanks for sharing the PDF tutorial. You are braver than me. I have never tried to make one yet. Thanks again!
ReplyDeleteSandi I'm in awe of your talent, I got sucked in by all your beautiful projects. Blessed to have you! Kari
ReplyDeleteHi Kari! Thank you for stopping by and leaving such a nice note. I wish I knew which "Kari" you are so I could properly thank you. Send me your e-mail address.
DeleteOk, I give........:-) Can I use this for my site: twosday's techniques? I will buy the product because this is just TOO STINKIN' CUTE!! I don't do any projects from other people w/out their permission, but I always give them credit and point people back to the blog or person it came from.
ReplyDeleteI left a message with more info above, so hope to hear from you soon.
ltedder@triad.rr.com
Lisa Tedder
Good blog postt
ReplyDelete